 Save
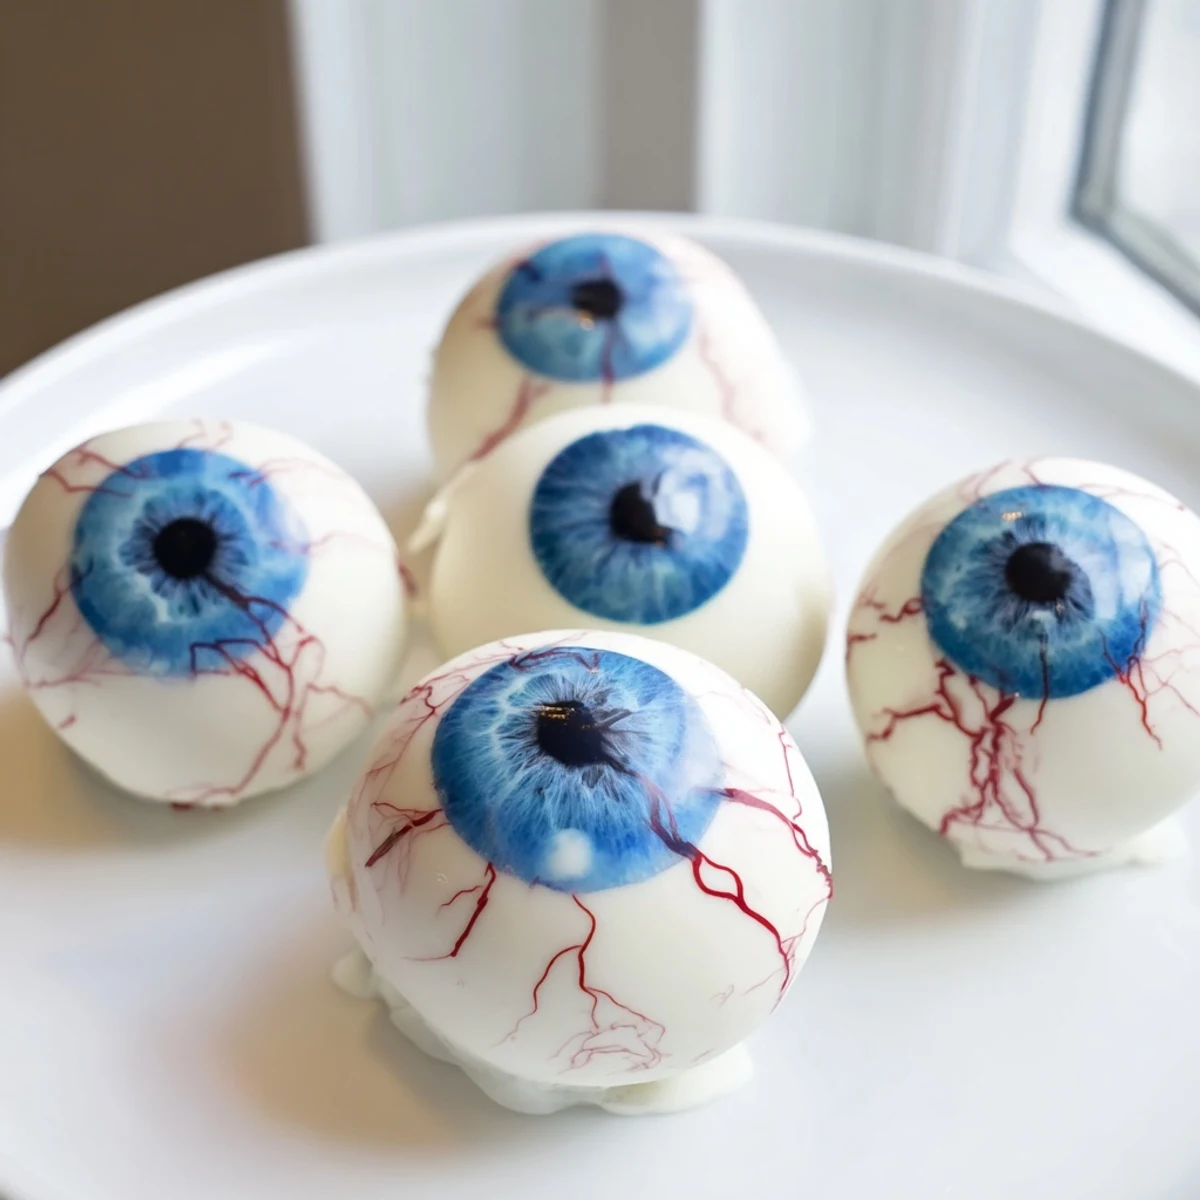
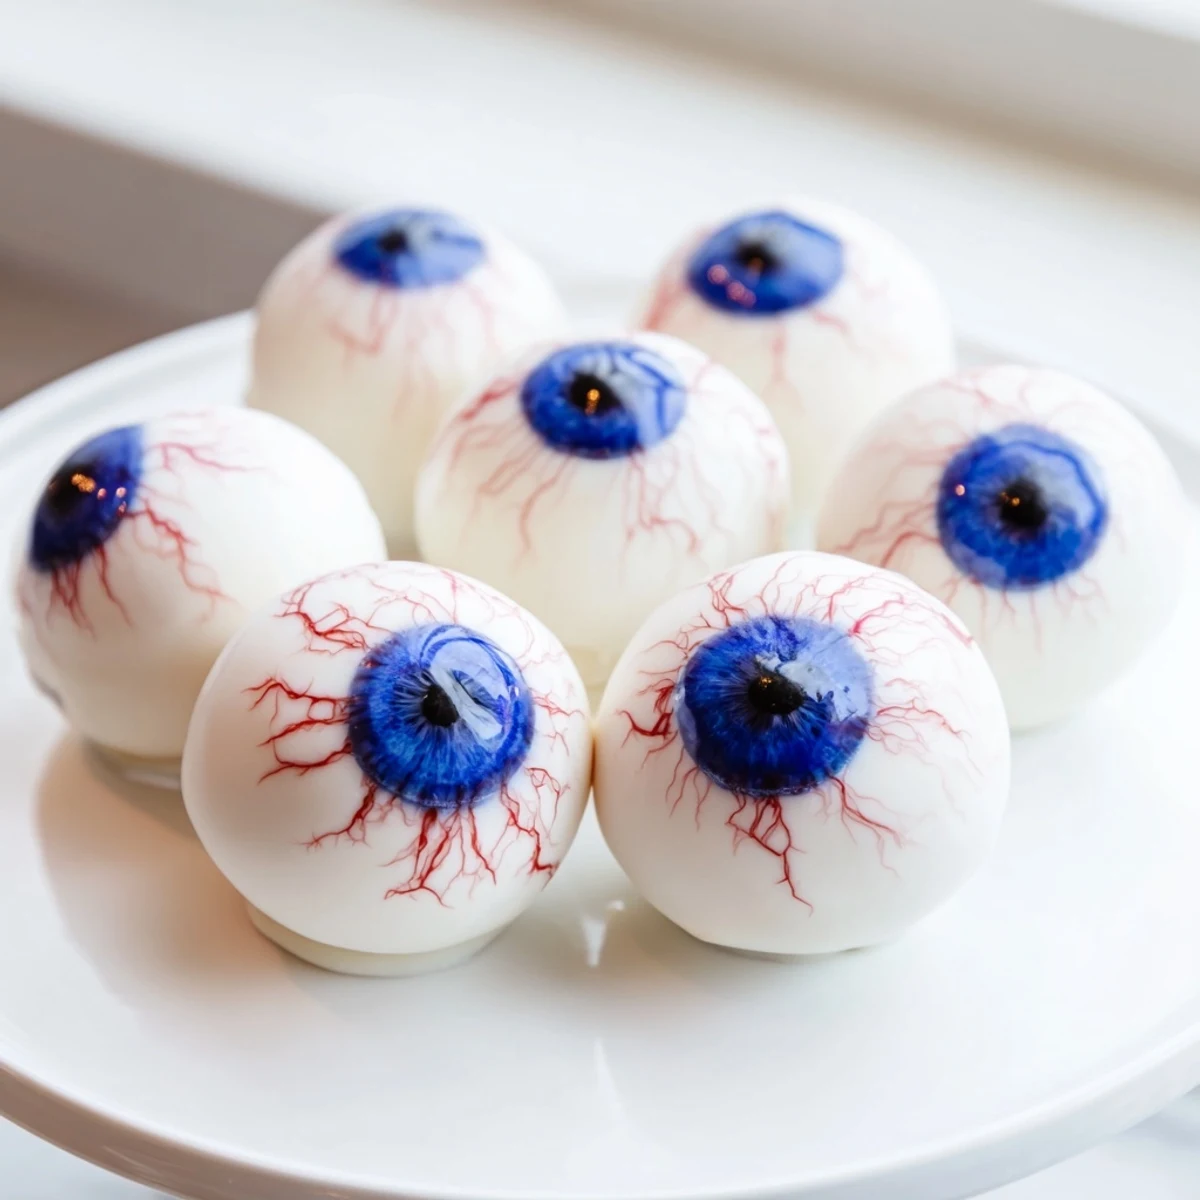
Save These festive Halloween cake eyeballs transform classic vanilla cake and cream cheese frosting into spooky party treats. The moist cake crumbles mix with silky buttercream to create perfectly moldable balls, then get dipped in smooth white chocolate for that authentic eyeball look. Add colored irises with blue or green candy melts, dark pupils, and squiggly red gel veins for maximum creepiness. Chill them for firm, bite-sized treats that disappear fast at Halloween parties.
Last October, my daughter decided five minutes before her class Halloween party that we absolutely had to bring something that would make everyone scream. I stood in my kitchen staring at a half-empty bag of white chocolate chips and a leftover vanilla cake from the weekend before, and suddenly these creepy little cake eyeballs popped into my head. We worked frantically with red food coloring staining our fingers, piping squiggly veins while laughing at how ridiculous they looked. The kids went absolutely wild for them, and honestly, so did all the parents who claimed they were too scared to eat one.
My sister called me in a panic last year when she volunteered to bring treats for her office Halloween potluck and remembered at 10 PM the night before that she had zero time to bake. I walked her through making these over the phone while she melted chocolate in her microwave and used a boxed cake mix she found in the back of her pantry. She texted me the next day saying her coworkers kept taking pictures before eating them, and someone actually asked if she'd hired a professional baker.
Ingredients
- Vanilla cake mix or homemade cake: The foundation that gets transformed into something entirely new, and using a good quality mix makes this totally doable on busy weeknights
- Eggs, vegetable oil, and water: These standard cake ingredients create the tender crumb we need for rolling into perfect spheres later
- Cream cheese: Adds that wonderful tang that cuts through the sweetness and helps the cake mixture hold its shape beautifully
- Unsalted butter: Room temperature butter creamed with the cream cheese creates the silkiest, most luscious frosting base
- Powdered sugar: Sweetens and thickens our frosting while giving structure to the cake balls so they don't fall apart
- Vanilla extract: Pure vanilla extract adds that classic warmth and depth that makes these taste homemade and special
- White chocolate or candy melts: Creates that glossy eyeball effect and provides the perfect sweet contrast to the rich cake inside
- Dark chocolate and colored candy melts: These transform simple cake balls into convincingly creepy eyeballs with minimal effort
- Red gel food coloring: The secret weapon for making these look genuinely spooky and surprisingly realistic
Instructions
- Bake your foundation:
- Preheat your oven to 180°C (350°F) and prepare your vanilla cake according to package or recipe directions, letting it cool completely until you can handle it without burning your fingers
- Create the crumb base:
- Break the cooled cake into small pieces and work it with your hands until you have fine, uniform crumbs that will mix evenly with the frosting
- Make the creamy binder:
- Beat together the softened cream cheese, butter, powdered sugar, and vanilla extract until you have a silky smooth frosting that tastes delicious on its own
- Bring it together:
- Mix the frosting into your cake crumbs, starting with less and adding more until the mixture holds together perfectly when you squeeze it in your hand
- Shape your eyeballs:
- Scoop tablespoon portions and roll them between your palms to create 24 smooth, round balls, placing each one on a parchment-lined tray
- Chill for success:
- Pop the tray in the freezer for 20 minutes, which firms them up enough that the coating wont crack and makes dipping so much easier
- Create the white coating:
- Melt the white chocolate gently in short bursts, stirring until completely smooth and fluid but not overheated or scorched
- Dip and coat:
- Working with one ball at a time, dip each into the melted chocolate, using a fork to lift it out and tap off any excess coating before returning it to the tray
- Add the iris:
- While the white coating is still soft, pipe or carefully place a small circle of colored candy melt in the center of each ball to create the colored part of the eye
- Create the pupil:
- Once the iris has set slightly, add a small dark dot of dark chocolate or black candy melt in the very center for that staring effect
- Make it spooky:
- Use red gel food coloring to squiggle some convincing blood vessels radiating from the colored part of each eye
- Set completely:
- Let all the decorations harden completely at room temperature before serving, which takes about 30 minutes depending on how warm your kitchen is
 Save
Save The year I made these for my Halloween dinner party, I set them out on a black serving platter surrounded by dry ice that my husband somehow procured from his workplace. When the lights dimmed and the fog rolled across the table, those glowing eyeballs looked disturbingly real. One guest actually gasped and refused to touch them for ten minutes until someone else took a bite and moaned about how good they were.
Getting The Right Texture
The secret to perfectly textured cake eyeballs is getting the ratio of frosting to cake crumbs just right. Too much frosting and they'll be sticky and impossible to coat, while too little and they'll crumble when you try to dip them. I've found that starting with half the frosting and gradually adding more while testing the mixture gives you the perfect consistency every single time.
Chocolate Melting Mastery
White chocolate can be temperamental and will seize if even a tiny drop of water gets into it, so make sure all your bowls and utensils are completely dry before you start melting. I work in 30-second bursts in the microwave, stirring between each one, and stop when there are still a few small lumps visible. The residual heat finishes melting them perfectly without overheating the chocolate, which keeps it glossy and smooth for dipping.
Decoration Secrets That Sell The Effect
The difference between cute eyeballs and genuinely creepy ones comes down to the details. Vary the iris colors slightly between eyes so they look more realistic, and make the pupils slightly different sizes rather than perfectly uniform. The red veins should be thin and irregular, radiating outward from the iris like real blood vessels, and I always make a few eyes with slightly squiggly pupils to make them look even more unsettlingly alive.
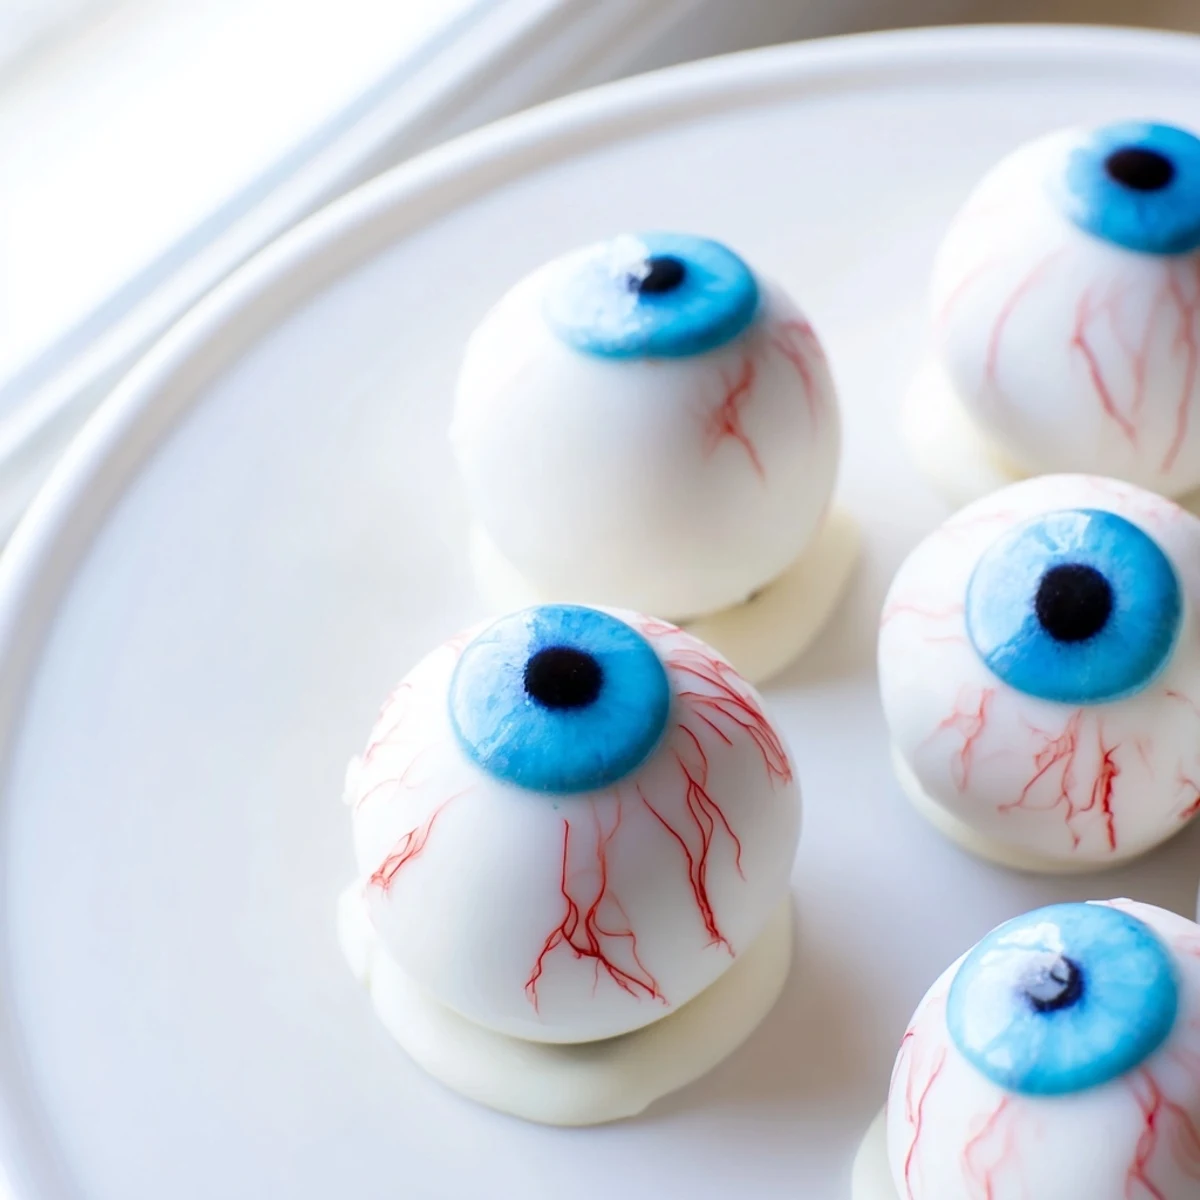
- A tiny dot of white on each pupil makes them look wet and staring
- Chill the finished eyeballs in the fridge for 15 minutes before serving for the best texture
- Store them in a single layer to prevent the decorations from smearing or sticking together
 Save
Save These Halloween eyeballs have become such a tradition that my kids now start asking about them in September, and I've caught my husband sneaking them from the refrigerator days before the party. Happy haunting, everyone.
Recipe FAQs
- → How long do Halloween cake eyeballs stay fresh?
-
Store these spooky treats in an airtight container in the refrigerator for up to one week. The chilled texture helps them maintain their shape and keeps the chocolate coating firm. For best results, bring them to room temperature for 10-15 minutes before serving.
- → Can I make these eyeball cake pops ahead of time?
-
Absolutely! Prepare the cake balls and freeze them undecorated for up to one month. When ready to serve, simply thaw in the refrigerator overnight, then dip in chocolate and add decorations. The coating sets quickly, so you can decorate them the day of your party.
- → What's the best way to melt chocolate for coating?
-
Melt white chocolate or candy melts in 30-second intervals in the microwave, stirring between each burst. Alternatively, use a double boiler on low heat. The key is gentle heating to prevent seizing. For smoothest results, add a teaspoon of coconut oil or vegetable shortening to thin the coating.
- → Can I use different cake flavors?
-
Yes! Chocolate, red velvet, or even funfetti cake work beautifully. Dark chocolate cake creates dramatic contrast with the white coating. Just ensure the cake is completely cool before crumbling, and adjust frosting amounts slightly if using moister cake varieties.
- → How do I prevent the cake balls from falling off sticks?
-
If using cake pop sticks, dip the tip in melted chocolate before inserting into the chilled ball. The chocolate acts as glue once hardened. Let them set upright in a styrofoam block or heavy glass. For extra security, chill the assembled pops for 15 minutes before serving.
- → What if my chocolate coating cracks?
-
Cracking usually happens when the cake balls aren't cold enough or the chocolate is too hot. Ensure your balls are thoroughly chilled (20 minutes in the freezer). Let the melted chocolate cool slightly before dipping. Work quickly and tap off excess coating gently to avoid thick layers that crack.
