 Save
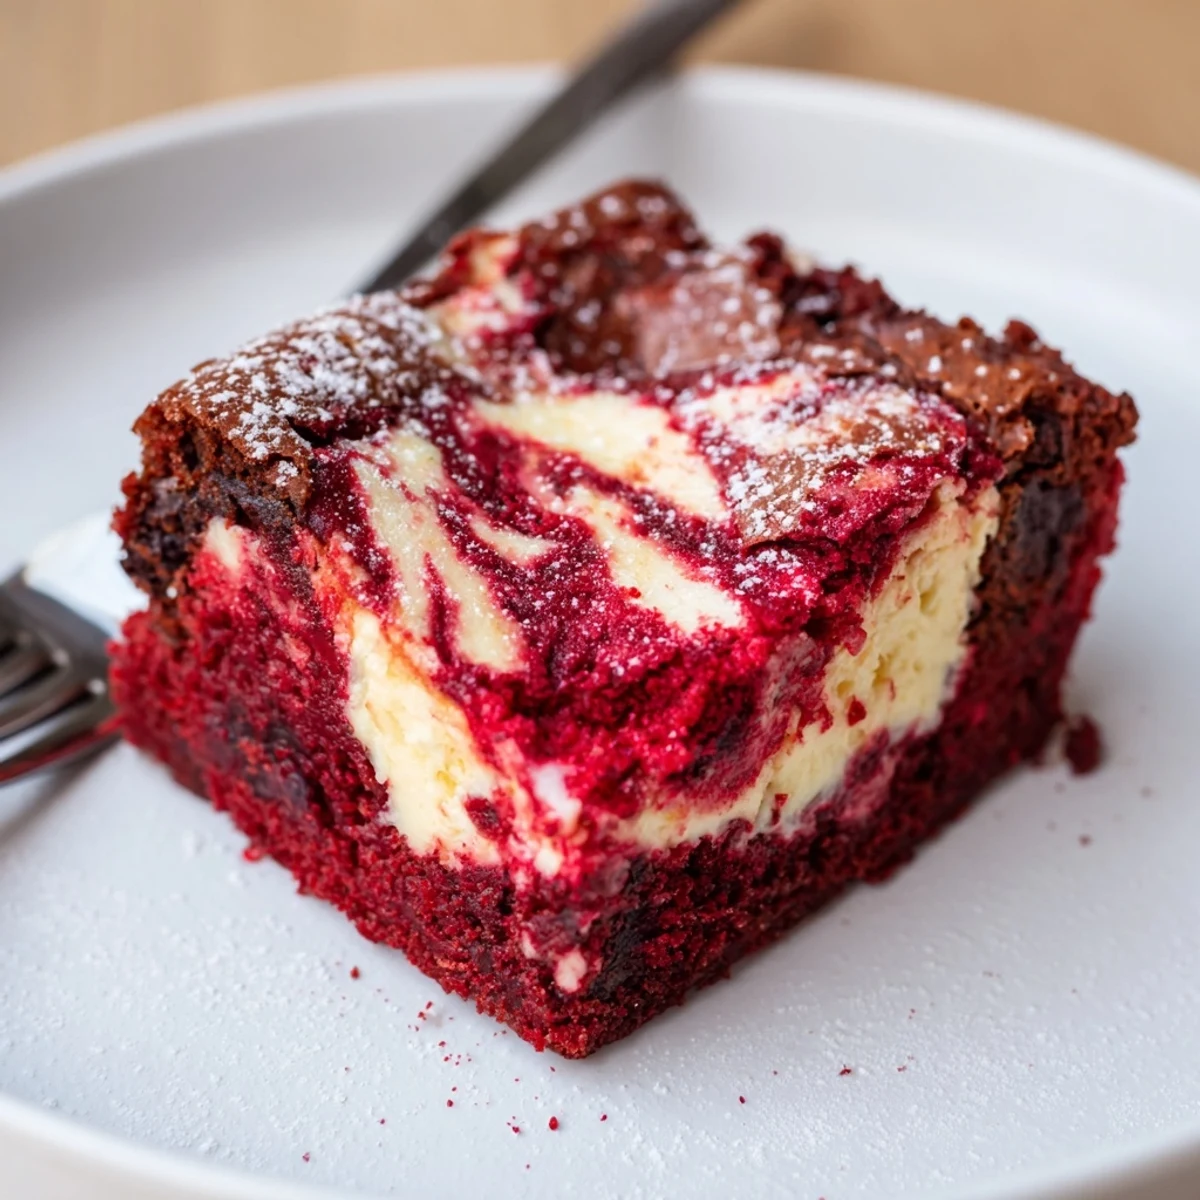
Save Rich, fudgy red velvet brownie batter forms the base, topped with a smooth, tangy cheesecake layer and a delicate marbled swirl. Bake at 175°C (350°F) until the center is mostly set, then cool completely and chill for at least an hour to firm the layers. Use gel coloring for vibrant hue and gently swirl reserved batter for a defined contrast.
The first time I pulled these red velvet brownies out of the oven, the kitchen lights reflected off the marbled cheesecake top and I had to laugh at how proud I felt, like I’d just completed a work of art. There’s something mischievous about swirling two batters together and not really knowing how they’ll turn out until that first slice. The scent of chocolate and vanilla hung in the air for hours, drawing people into the kitchen before they’d even cooled. It’s my go-to recipe whenever I want to impress with minimal drama.
Last Valentine’s Day, I decided at the last minute to bring dessert to a small dinner with friends. Watching them cut into each square, surprised by the dramatic swirl, I knew this recipe had found its intended audience. We ended up eating the brownies straight from the fridge, forks clinking, laughing over who took the biggest piece. It was as much about the conversation as it was the brownies.
Ingredients
- Unsalted butter: Melting it first ensures your brownie base turns out fudgy, not cakey—don’t rush this step.
- Granulated sugar: I always whisk this thoroughly into the butter for that signature fine crumb and glistening top.
- Eggs: Room temperature eggs blend smoothly and give better lift and texture.
- Vanilla extract: It warms up both layers, but don’t skimp—its aroma ties the whole dessert together.
- Red food coloring: Use gel for a more intense color, stirring well so your batter is evenly vibrant.
- All-purpose flour: I sift mine with the cocoa to keep the brownies tender; be gentle when folding to avoid a tough result.
- Unsweetened cocoa powder: Even a couple tablespoons changes everything, so pick a rich, dark one.
- Salt: A pinch intensifies all the flavors; I always taste the batter (before eggs!) to check the balance.
- Cream cheese: Room temperature is key—cold cream cheese will leave lumps, so let it soften fully first.
- Granulated sugar (cheesecake layer): Sweetens but doesn’t overpower; I stop mixing as soon as it’s combined to preserve the layer's silkiness.
- Egg (cheesecake layer): Adds structure; mix just enough for a creamy texture, resisting the urge to overbeat.
- Vanilla extract (cheesecake layer): That gentle floral note gives a subtle twist to the tangy cheesecake swirl.
Instructions
- Get ready to bake:
- Preheat your oven to 175°C (350°F) and line a square pan with parchment, letting the edges hang over for easy lifting later. The paper will rustle and sigh as you press it snugly into each corner.
- Whisk up the brownie base:
- In a medium bowl, whisk melted butter and sugar until the mixture looks shiny and a bit grainy. Beat in the eggs, vanilla, and that glowing red food coloring until velvety-smooth and totally even.
- Add dry ingredients gently:
- Sift in flour, cocoa, and salt; fold slowly with a spatula until there are no dry streaks. Scoop out about one-quarter of the batter and set it aside for swirling magic later.
- Make the cheesecake layer:
- In a clean bowl, beat softened cream cheese and sugar until fluffy and smooth—no lumps allowed. Add the egg and vanilla and mix just until creamy, being careful not to overwhip.
- Layer and marble:
- Spread the bulk of the red velvet batter evenly in your pan. Carefully pour the cheesecake mixture on top and nudge gently to cover without mixing too much.
- Create the swirl:
- Dollop spoonfuls of the reserved red velvet batter over the cheesecake layer. Drag a knife or skewer through the batters to create beautiful, gentle swirls just to your liking.
- Bake and check:
- Slide the pan onto the center rack and bake for 33–37 minutes—your kitchen will start to smell incredible—until the center is just set and a toothpick comes out with moist crumbs but not wet batter.
- Cool, then chill:
- Let the pan cool completely so the layers set, then chill at least 1 hour in the fridge before slicing—it makes cutting neater and every bite more refreshing.
 Save
Save I’ll never forget slicing these brownies for a neighbor’s birthday—she paused mid-bite, closed her eyes, and just smiled. Sometimes food really does do the heavy lifting in making a moment special.
Swirl Success: Make Your Brownies Beautiful
Every time I swirl the batters, I keep a light touch with the knife—it’s more about gentle curves than big sweeps or you’ll lose the contrast. The trick is to stop before you think it’s enough; the pattern always intensifies as it bakes. Sometimes I zigzag just once, then a few loops for good measure. There’s no wrong way to do it, and every batch looks a little different.
How to Serve & Store
These brownies honestly taste even better cold from the fridge, slicing clean with each knife stroke. I always keep the leftovers in an airtight container and they stay delicious for up to five days. If you want to wow guests, a sprinkle of cocoa powder or a handful of fresh raspberries is all you need. Just let the brownies sit at room temp for a few minutes so the cheesecake softens for maximum creaminess.
My Favorite Flavor Twists
After a few bakes, I started adding chocolate chips under the cheesecake layer for a hidden little pocket of flavor, and once I even tried orange zest for a citrusy note. Sometimes I top with a dusting of powdered sugar for drama, especially when serving to a crowd. Swapping vanilla for almond extract is a fun twist if you’re in the mood to experiment.
- Let brownies cool in the pan for clean layers.
- If you use liquid food coloring, add a little more for a vibrant red.
- Always scrape down your bowls so nothing’s wasted.
 Save
Save May every bite make your sweet moments last a little longer. I know these red velvet cheesecake brownies will inspire you to bake and share with confidence.
Recipe FAQs
- → How do I achieve a defined marbled swirl?
-
Dollop the reserved red velvet batter over the cheesecake in small spoonfuls, then use a knife or skewer to make a few gentle figure-eight motions. Over-swizzling blends the layers, so keep movements light to preserve contrast.
- → Can I use gel food coloring instead of liquid?
-
Yes. Gel color gives a deeper, more vibrant tone with less liquid, so start with a small amount and adjust until you reach the desired shade while keeping batter consistency intact.
- → How can I tell when the center is done?
-
The center should be mostly set with a few moist crumbs clinging to a toothpick. Avoid overbaking to keep the brownie base fudgy while the cheesecake layer remains creamy.
- → What's the best way to get clean slices?
-
Chill the pan for at least an hour to firm up layers, then lift out using the parchment overhang. Use a sharp knife warmed under hot water and wiped dry between cuts for neat edges.
- → How should leftovers be stored?
-
Store chilled in an airtight container for up to 4 days to maintain texture. Bring to room temperature briefly before serving if you prefer a softer bite.
- → Any tips to boost richness or texture?
-
Fold in a handful of chocolate chips on the brownie layer before adding the cheesecake for extra richness, or use full-fat cream cheese for a silkier top layer.
