 Save
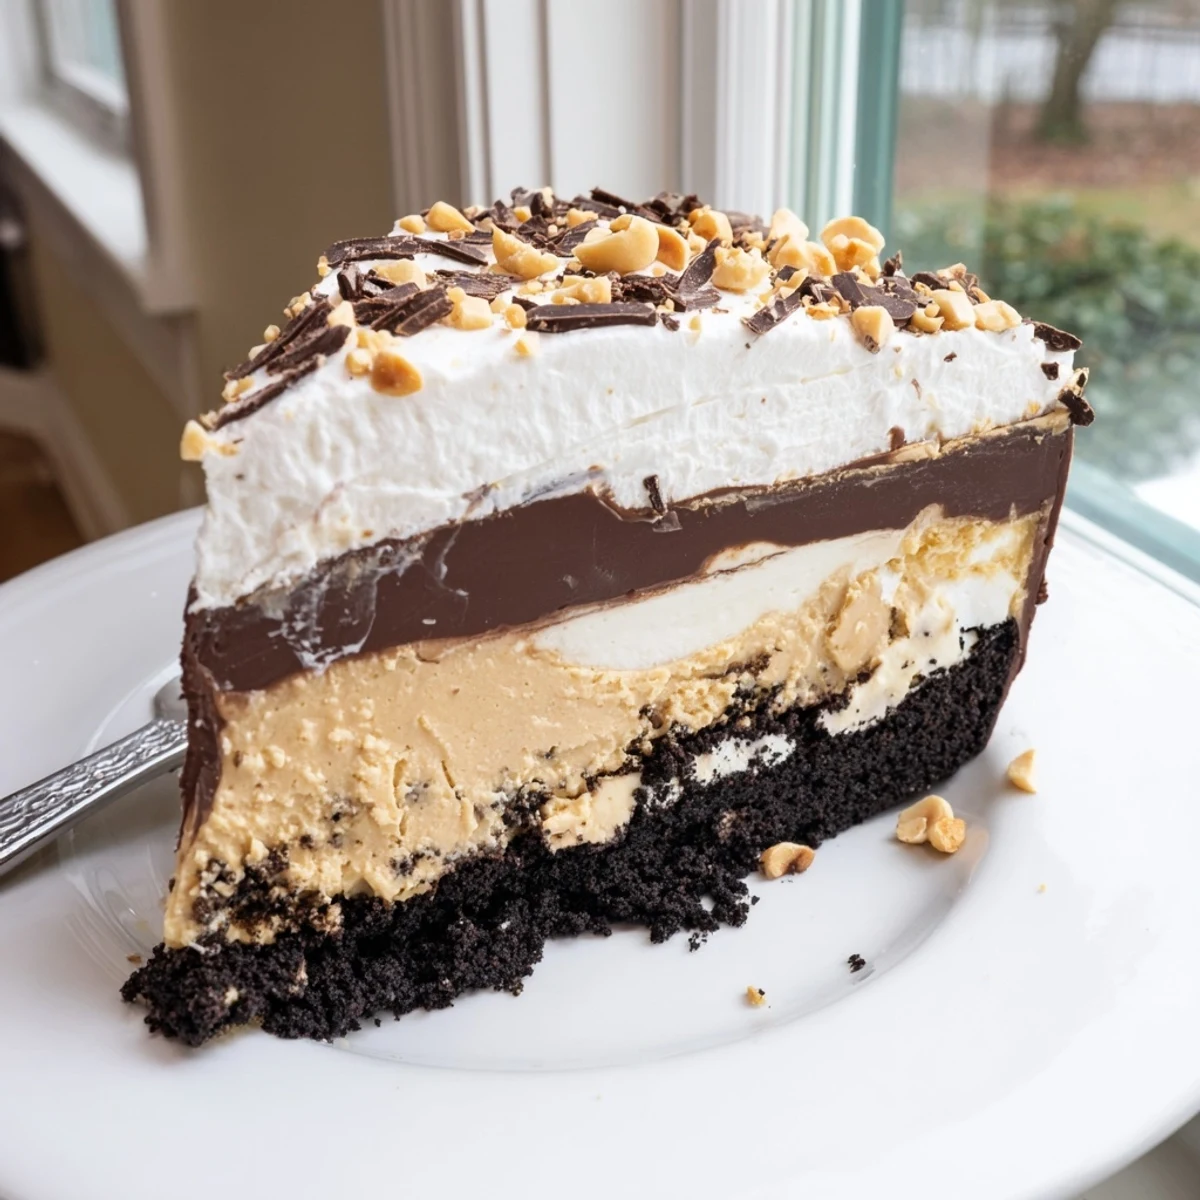
Save This no-bake peanut butter layered delight is a showstopping dessert that requires zero oven time. A crunchy chocolate cookie crust forms the foundation, topped with a silky peanut butter and cream cheese filling, a glossy chocolate ganache layer, and billowy whipped topping.
With just 25 minutes of prep and an overnight chill, you'll have a decadent treat that serves eight. Garnish with chopped peanuts and chocolate shavings for an elegant finish that will impress any crowd.
The sound of a springform pan clicking shut on a Tuesday night in March is oddly satisfying, especially when you know what is about to go inside it. My neighbor Dave had been raving about some peanut butter dessert his sister made for Thanksgiving, and I told him I could do better. That competitive spirit led to three test batches in one week and a very happy block of taste testers. This layered delight was the undeniable winner.
Dave showed up at my door with a six pack of milk, yes milk, the night I made the final version. We stood in the kitchen eating squares of it straight from the pan because neither of us wanted to wait for plates. His sister eventually asked for the recipe, which I consider a formal victory.
Ingredients
- Chocolate sandwich cookies (200 g): Crush them finely but not into dust, because a few bigger crumbs give the base a satisfying bite.
- Unsalted butter (60 g), melted: This binds the crumbs together and helps the base set firm in the freezer.
- Cream cheese (250 g), softened: Let it sit out for at least thirty minutes so it blends smoothly without lumps.
- Creamy peanut butter (180 g): Use the standard commercial kind here, not the natural stir kind, because the stabilizers help the layer hold its shape.
- Powdered sugar (100 g): Adds sweetness and body to the peanut butter layer without making it grainy.
- Whipped topping (150 ml), thawed: Folding this in creates that light, mousse like texture that makes each bite feel airy.
- Semisweet chocolate chips (120 g): The ganache layer needs real chocolate, not chips labeled as baking morsels, for the smoothest finish.
- Heavy cream (80 ml): This turns the chocolate into a pourable ganache that sets with a glossy sheen.
- Whipped topping (200 ml), thawed: For the final cloud like layer on top.
- Chopped roasted peanuts (30 g, optional): A sprinkle of salt and crunch that makes the whole thing sing.
- Chocolate shavings (optional): Because a little extra chocolate never hurt anyone.
Instructions
- Build the crust:
- Combine the crushed cookies and melted butter in a bowl until the mixture feels like wet sand that holds together when you squeeze it. Press it firmly and evenly into the bottom of your springform pan, using the back of a spoon or the flat bottom of a glass to really pack it in. Pop it into the freezer for fifteen minutes while you work on the next layer.
- Whip up the peanut butter filling:
- Beat the softened cream cheese, peanut butter, and powdered sugar together until completely smooth and no streaks remain. Gently fold in the whipped topping with a spatula, using slow sweeping motions so you do not deflate it. Spread this mixture over your chilled crust, smoothing the top with an offset spatula or the back of a spoon.
- Make the chocolate ganache:
- Microwave the chocolate chips and heavy cream together in twenty second bursts, stirring between each one, until you have a glossy, lump free mixture. Let it cool for about five minutes so it does not melt the peanut butter layer beneath it. Pour it over the peanut butter filling and tilt the pan gently to coax it into an even layer.
- Chill everything:
- Cover the pan with plastic wrap and refrigerate for at least four hours, though overnight is even better if you can stand the wait. The layers need this time to firm up and meld into something sliceable.
- Add the finishing touches:
- Spread the remaining whipped topping over the set chocolate layer in soft swoops. Scatter chopped peanuts and chocolate shavings across the top however feels right to you.
- Slice and serve:
- Run a thin knife under hot water, dry it off, and slice into squares or wedges for the cleanest cuts. Serve straight from the fridge because this dessert is best when well chilled.
 Save
Save I brought this to a potluck once and watched a woman quietly go back for a third slice when she thought no one was looking. That moment confirmed this dessert has a pull that goes beyond normal cravings.
Swaps and Twists
Crushed pretzels mixed into the cookie base add a salty snap that pairs beautifully with the sweet peanut butter layer. Almond butter or cashew butter can replace the peanut butter entirely if you want a different flavor profile, though the texture stays almost identical. Gluten free cookies work perfectly for the crust, so this can easily accommodate friends with sensitivities.
Tools You Will Want
A nine inch springform pan is ideal because the removable sides make it easy to lift the whole dessert out for clean slicing. A hand mixer saves your arm when beating the cream cheese mixture, though a whisk and some determination will get you there too. Keep a rubber spatula handy because you will want every last bit of that peanut butter filling scraped from the bowl.
Serving and Storing
This dessert holds well in the fridge for up to four days, though the cookie base softens slightly over time. A glass of cold milk alongside a slice is the classic pairing, but a pour of dessert wine turns it into something unexpectedly elegant.
- Cover any leftovers tightly with plastic wrap to keep the whipped topping from absorbing fridge odors.
- Freeze individual slices wrapped in plastic for up to one month and thaw them in the fridge before serving.
- Always add the peanut and chocolate garnishes just before serving so they stay crisp and pretty.
 Save
Save This is the kind of dessert that makes people close their eyes on the first bite, and that is honestly the highest compliment any home cook can receive.
Recipe FAQs
- → Can I make this dessert ahead of time?
-
Absolutely! In fact, this dessert benefits from being made ahead. You can prepare it up to two days in advance and keep it covered in the refrigerator. The layers set beautifully overnight, making it perfect for entertaining.
- → Can I use natural peanut butter instead of creamy?
-
Traditional creamy peanut butter works best for the smoothest texture and proper setting. Natural peanut butters tend to separate and can make the filling greasy. If you prefer natural varieties, stir thoroughly and consider adding a bit more powdered sugar to help bind the layer.
- → How do I get clean slices when serving?
-
Use a sharp knife dipped in hot water and dried between each cut. This technique ensures clean, professional-looking slices. Always serve chilled, as the dessert holds its shape better when cold.
- → What can I substitute for the whipped topping?
-
You can use an equal amount of freshly whipped heavy cream sweetened with a tablespoon of powdered sugar and a teaspoon of vanilla extract. Stabilize it with a pinch of cream of tartar if making ahead.
- → Is this dessert freezer-friendly?
-
Yes, you can freeze individual slices wrapped tightly in plastic wrap for up to one month. Thaw in the refrigerator for a few hours before serving. The texture remains excellent, though the whipped topping may soften slightly.
- → How can I make this gluten-free?
-
Simply swap the chocolate sandwich cookies for a gluten-free alternative. Many brands offer gluten-free chocolate cookies that work perfectly for the crust. Always verify that your chocolate chips are also certified gluten-free.
