 Save
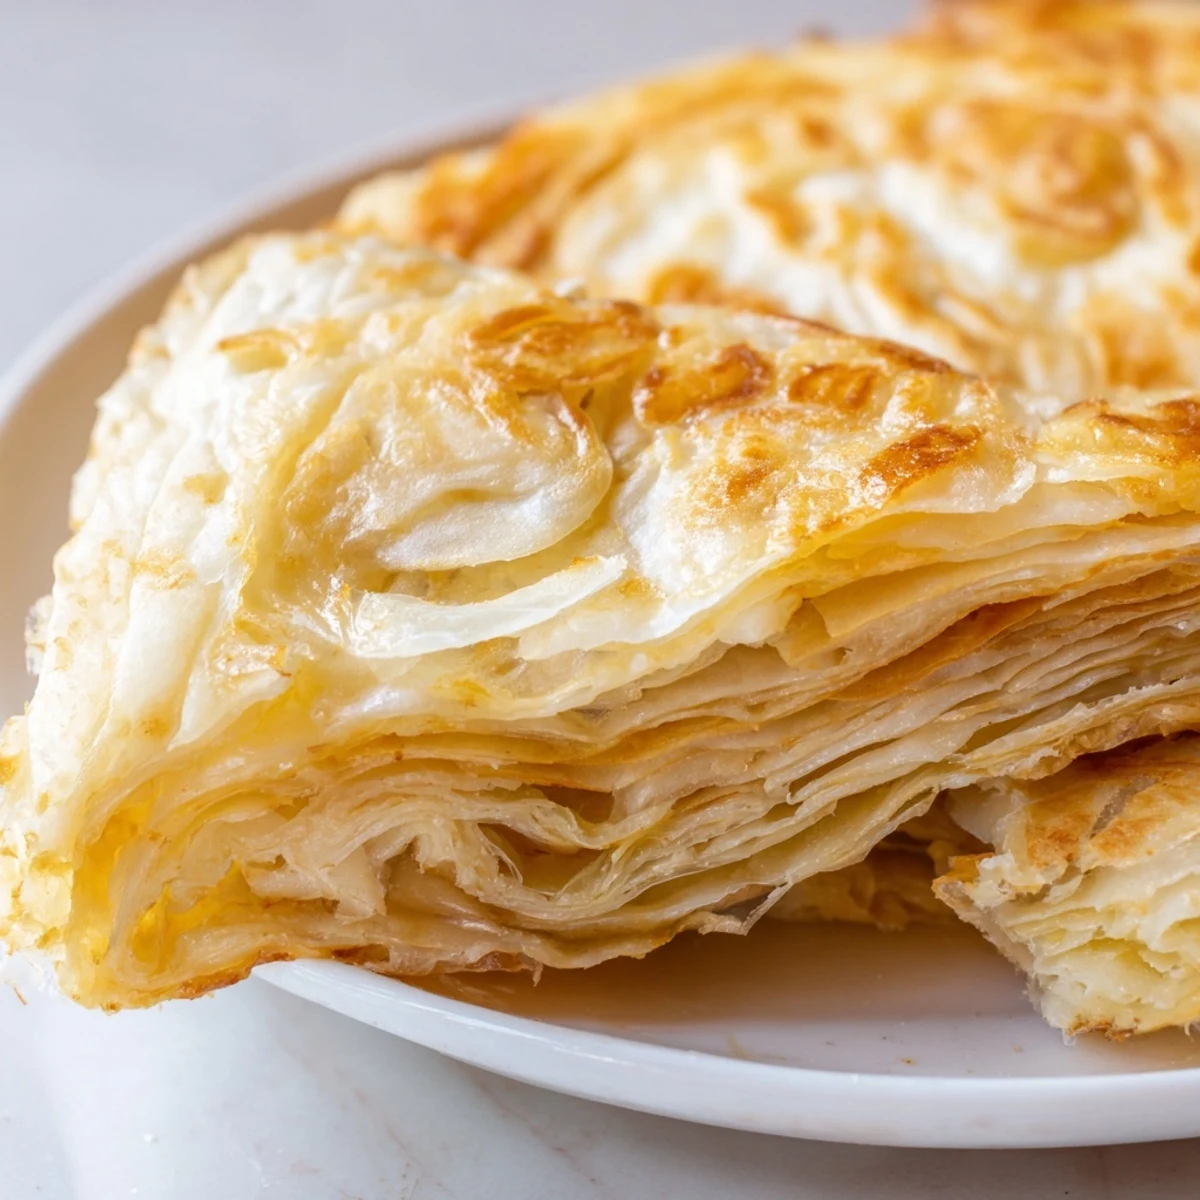
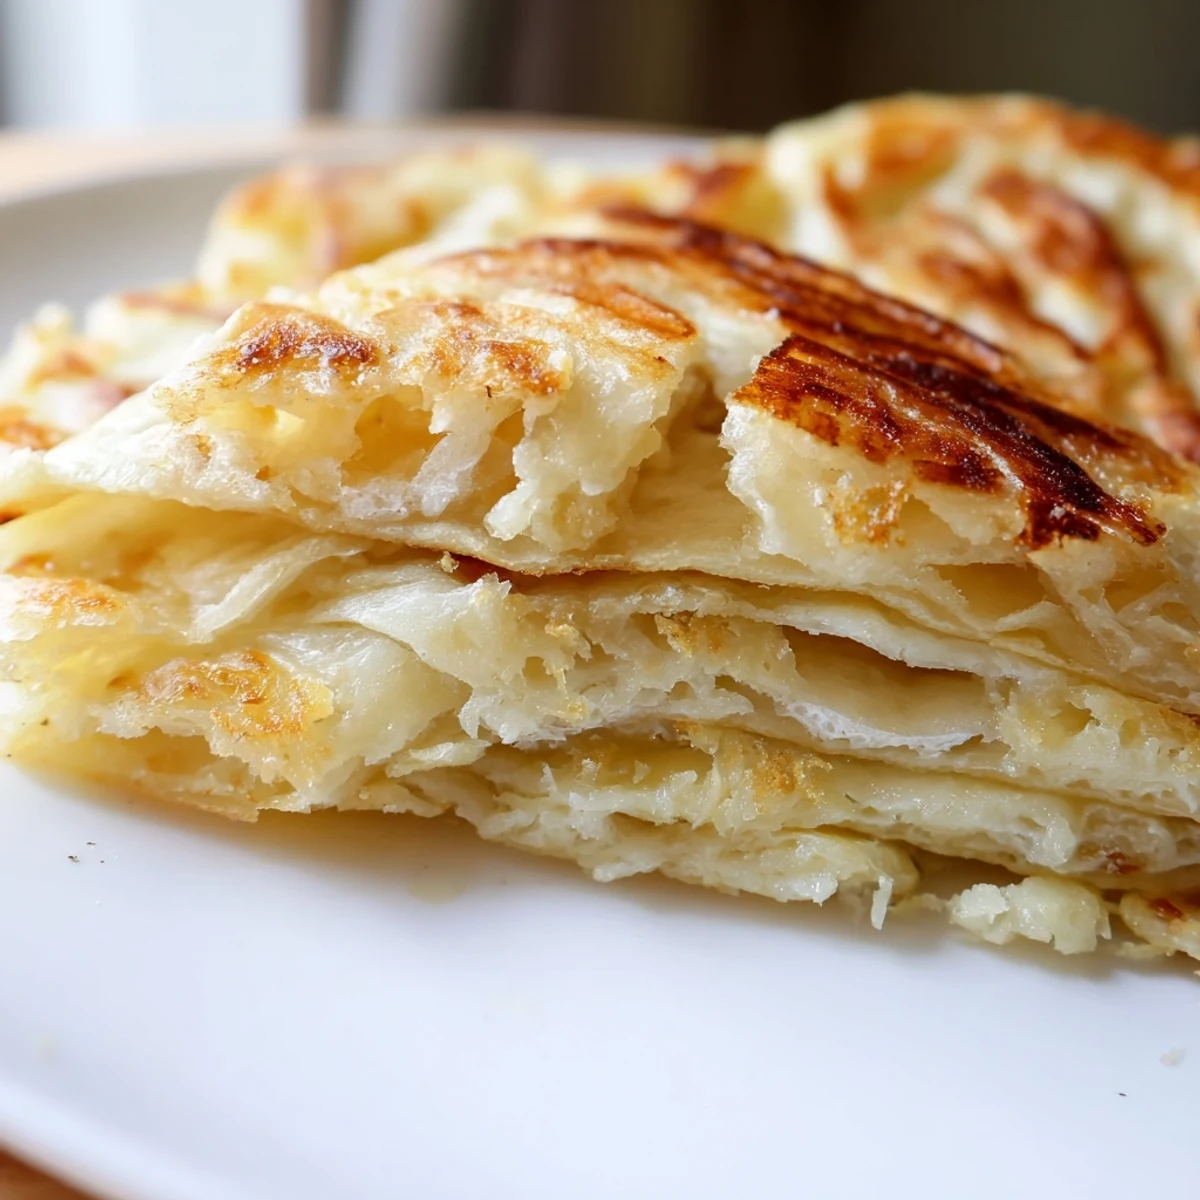
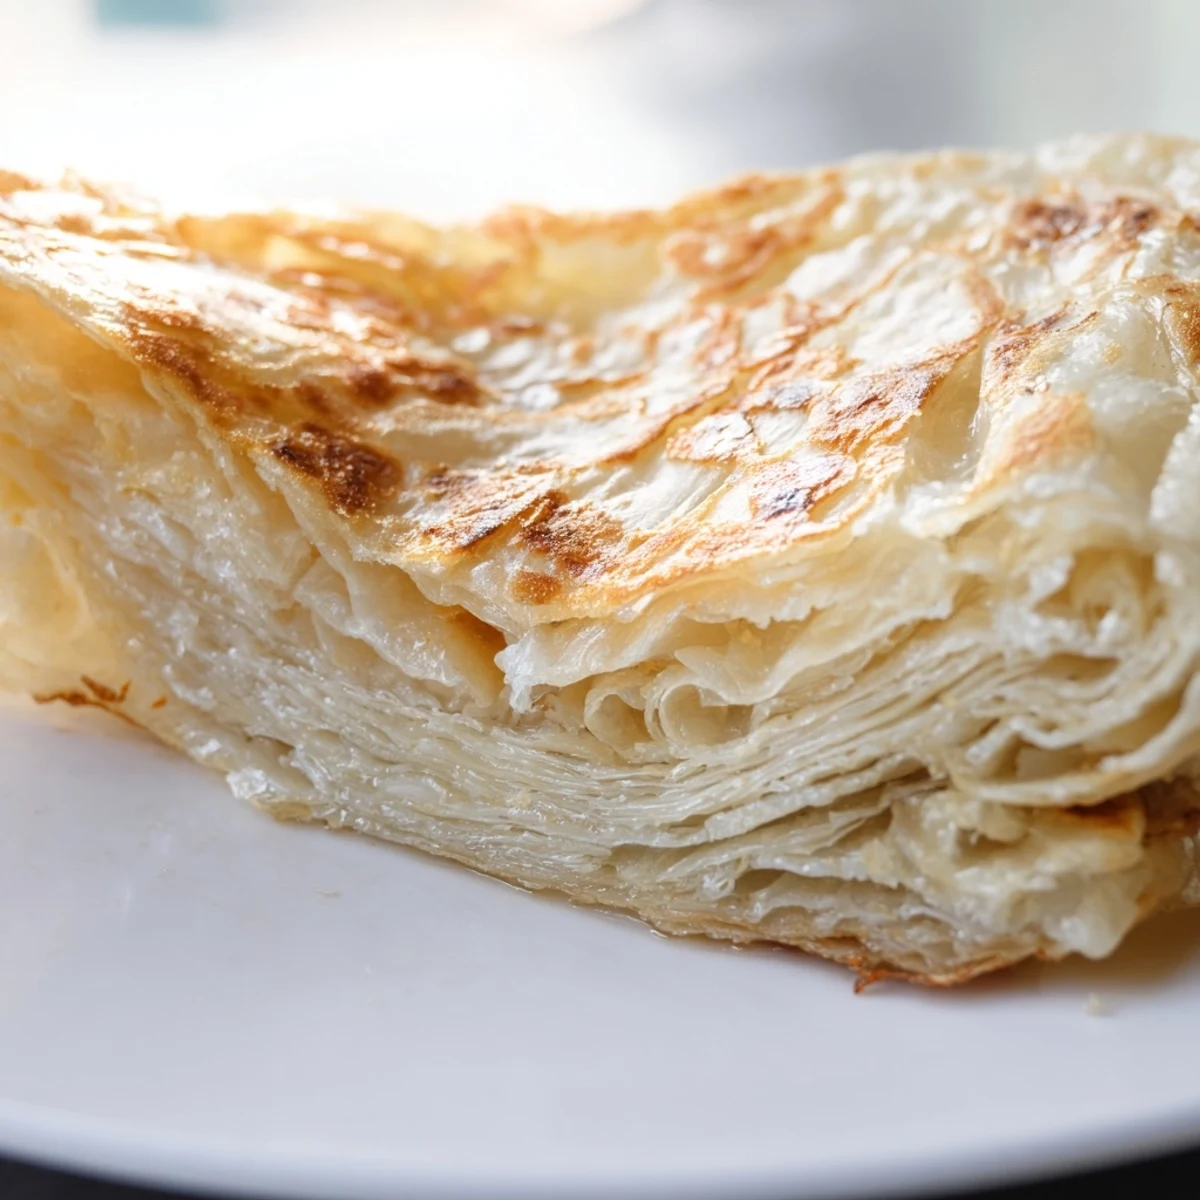
Save Flaky Roti Canai brings the beloved Malaysian street food classic to your kitchen. This traditional flatbread achieves its signature texture through a unique stretching and folding technique that creates dozens of paper-thin layers. The dough rests for two hours, developing elasticity that allows you to stretch it until almost translucent. A combination of condensed milk and ghee adds subtle richness while keeping the interior tender and chewy.
Cooking on a hot griddle creates those sought-after crispy, golden surfaces. The final clapping technique between hands fluffs the layers, ensuring each bite delivers the perfect contrast between shattering exterior and pillowy softness inside. Serve alongside dhal, chicken curry, or with a sprinkling of sugar for a delightful sweet variation.
The first time I watched a street vendor in Kuala Lumpur spin roti dough overhead, flipping and stretching it until it became impossibly thin, I stood there for twenty minutes mesmerized. He made it look effortless, like some beautiful dance between hands and dough. When I finally tried making it in my tiny apartment kitchen, my first attempt ended up more like a thick pancake than those ethereal layers I had witnessed. But something about the process kept pulling me back—maybe it was the way the dough transformed under my palms, or how the smell of ghee hitting a hot pan filled the entire room.
My sister visited last winter and we spent an entire Sunday afternoon attempting roti canai together, flour dusting everything from our hair to the ceiling fan. By the fourth attempt, we finally achieved those translucent, paper thin stretches that create the signature flaky layers. We ate them standing at the counter, tearing off pieces and dipping them into curry I had made earlier, both of us grinning like we had just unlocked some secret cooking achievement. Now whenever she visits, the first thing she asks is whether we are making roti.
Ingredients
- All-purpose flour: Creates the perfect structure for those signature layers, no special flour needed
- Salt and sugar: Essential balance that enhances flavor without making the dough sweet
- Condensed milk: The secret ingredient that adds richness and helps create that tender texture
- Melted ghee or butter: Infuses the dough with fat for flakiness and incredible aroma
- Warm water: Brings everything together and activates gluten development for stretchiness
- Additional ghee or oil: Keeps dough workable during shaping and creates that golden finish when cooking
Instructions
- Mix the foundation:
- Combine flour, salt, and sugar in a large bowl, then stir in melted ghee and condensed milk until the mixture looks crumbly and moist
- Form the dough:
- Gradually pour in warm water while mixing with your hand or a spoon until a soft, slightly sticky dough comes together
- Work the gluten:
- Knead the dough for 8 to 10 minutes until it feels smooth, elastic, and bounces back when pressed
- Portion and rest:
- Divide into 6 equal balls, coat each with ghee or oil, arrange on a greased tray, cover with plastic wrap, and let rest for at least 2 hours
- Prepare your workspace:
- Generously grease your work surface and hands with oil to prevent sticking during the stretching process
- Stretch into thinness:
- Flatten one dough ball with your palms, then gently pull and stretch the dough outward until it becomes almost translucent, about 18 inches wide
- Create the layers:
- Fold the sides inward to form a long rectangle, roll it up like a Swiss roll, then coil it into a spiral and tuck the end underneath
- Heat the pan:
- Warm a non stick skillet or griddle over medium heat and brush lightly with ghee or oil
- Flatten and cook:
- Press one spiral portion into a 6 to 7 inch round and cook for 2 to 3 minutes per side until golden and crispy with visible layers
- Release the flake:
- Immediately after removing from heat, gently clap the roti between your hands to separate and fluff up the layers
 Save
Save There is something deeply satisfying about the clapping technique at the end, when you gently smack the cooked roti between your palms and watch the layers puff and separate. My neighbor once knocked on my door wondering what all the commotion was about, only to end up staying for dinner. That moment when someone takes their first bite, their eyes widening at the revelation of texture and flavor, reminds me why I keep making this recipe despite the effort involved.
Mastering the Stretch
The key to achieving those paper thin stretches is working with well rested dough at room temperature and using plenty of oil on your hands and surface. I find it helps to work quickly but gently, letting gravity do some of the work as you pull the dough outward from the center. Small tears can be patched by gently pressing the dough back together, and remember that practice truly does make perfect with this technique.
Cooking Temperature Secrets
Medium heat is your sweet spot because too high and the outside burns before the interior cooks through, while too low gives you a tough, leathery texture. I usually test my pan by flicking a few drops of water onto the surface, they should dance and evaporate within a second or two. Brushing the pan with ghee instead of pouring it creates that gorgeous golden color without making the bread greasy.
Serving and Storage
Roti canai is best served immediately after cooking while those layers are still warm and dramatically flaky. If you need to make them ahead, keep cooked rotis wrapped in a clean kitchen towel in a warm oven, but know they will lose some of their crispiness. Any leftovers can be reheated in a dry pan for about 30 seconds per side.
- Classic pairing is with dhal curry or chicken curry for dipping
- Try with condensed milk and sugar for a sweet breakfast variation
- Extra rotis freeze well for up to 2 months and reheat beautifully
 Save
Save The patience required for roti canai always rewards you with something extraordinary, humble ingredients transformed through technique and time into a dish that feels like a celebration on a plate.
Recipe FAQs
- → What makes roti canai flaky?
-
The flaky texture comes from the unique preparation method of stretching the dough extremely thin, then folding and rolling it into a spiral. This creates multiple layers that separate during cooking. Using ghee or oil throughout the process prevents the layers from sticking together, resulting in the signature flaky, layered texture when cooked.
- → Why does the dough need to rest for 2 hours?
-
Extended resting allows the gluten to relax completely, making the dough much more pliable and easier to stretch. Without proper resting, the dough would resist stretching and tear. This resting period is crucial for achieving the thin, translucent layers that make authentic roti canai so special.
- → Can I make the dough ahead of time?
-
Absolutely! After the initial 2-hour rest, you can refrigerate the dough balls for up to 24 hours. Bring them to room temperature for about 30 minutes before shaping and cooking. Some cooks even prefer overnight refrigeration as it develops flavor and makes the dough even easier to work with.
- → What's the purpose of clapping the cooked roti?
-
Clapping the hot roti between your hands separates the layers, creating air pockets and giving the bread its signature fluffy, airy texture. This traditional technique immediately after cooking helps prevent the layers from sticking together and ensures each piece remains light and separable.
- → Can I substitute condensed milk?
-
While condensed milk provides traditional sweetness and richness, you can substitute with equal parts coconut milk or regular milk with a teaspoon of sugar. The result will be slightly less sweet but still delicious. For a savory version, omit sweeteners entirely and increase the salt slightly.
- → Why is my roti not getting crispy?
-
If your roti lacks crispiness, ensure your pan is properly preheated over medium heat before adding the dough. Don't overcrowd the pan, and use enough ghee or oil to lightly coat the surface. Make sure you're stretching the dough thinly enough—thicker dough won't achieve the desired crispy texture.
