 Save
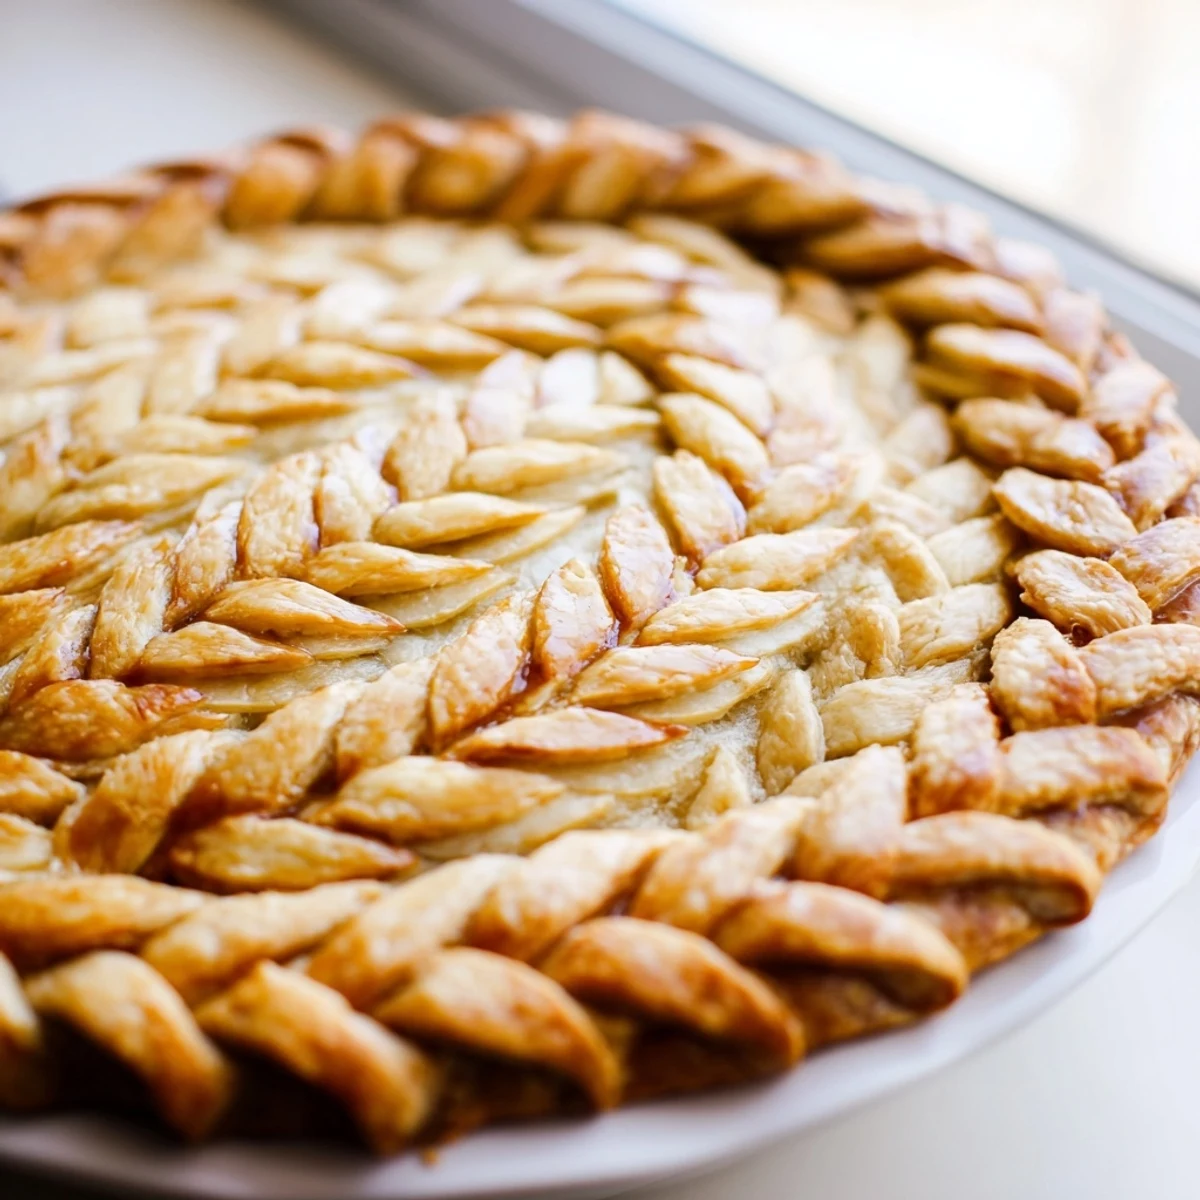
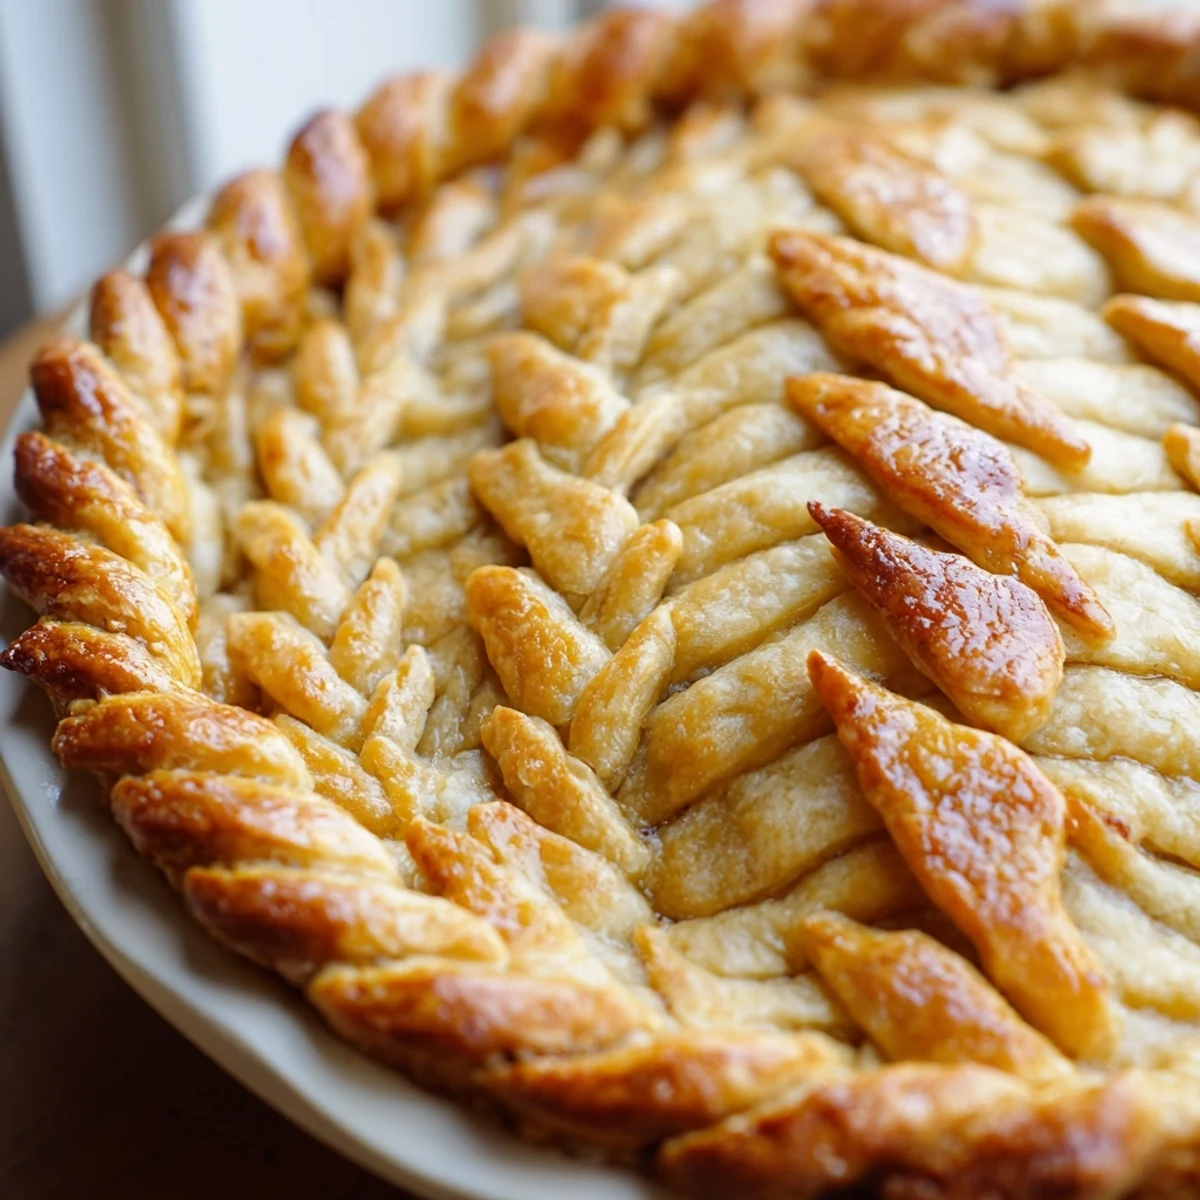
Save Transform ordinary pies into stunning showstoppers with this fishtail braid crust technique. The woven design creates a sophisticated edge that rivals professional bakery presentations. Perfect for holiday gatherings, dinner parties, or whenever you want to impress guests with your pastry skills.
The process involves preparing a classic butter pastry dough, cutting it into strips, and weaving them into intricate braided patterns along the pie rim. While it requires some patience and practice, the results are absolutely worth the effort.
This versatile decoration works beautifully with fruit pies, custard fillings, or savory quiches. The braided edge not only looks impressive but also helps seal in fillings and creates a sturdy crust that holds its shape during baking.
The first time I attempted a braided pie crust, my kitchen looked like a flour bomb had gone off. I was trying to impress my mother-in-law with what I called a 'fancy lattice' but ended up with something resembling a tangled fishing line. We laughed so hard we had to order pizza, but that failure sparked an obsession with decorative crusts that led me to the fishtail braid technique.
Last Thanksgiving, I brought three pies to my sister's house, all with this fishtail crust. Her father-in-law, a retired baker, actually asked who I'd hired to decorate them. When I explained it was just patience and a simple weaving pattern, he spent the rest of the evening teaching me his grandmother's braiding secrets. Sometimes the most elegant techniques have the humblest origins.
Ingredients
- 2 1/2 cups all-purpose flour: The foundation of any good crust, protein content helps develop structure without toughness
- 1 cup cold unsalted butter, cubed: Cold butter creates those magical flaky layers as it melts between flour sheets during baking
- 1 tsp salt: Enhances flavor and strengthens gluten structure for easier handling
- 1 tbsp sugar: Promotes browning and adds subtle sweetness that bridges sweet and savory fillings
- 6–8 tbsp ice water: Ice-cold water prevents butter from softening too quickly, ensuring flaky results
- 1 egg, beaten: Creates that gorgeous golden finish that makes pies look irresistible
- 1 tbsp milk: Thins the egg wash for smoother application and helps braids brown evenly
Instructions
- Prepare the perfect pastry dough:
- Whisk flour, salt, and sugar in a large bowl, then work in cold butter until mixture resembles coarse crumbs with some pea-sized pieces remaining. Gradually add ice water, mixing gently with your hands just until dough holds together when squeezed.
- Chill and divide for success:
- Form dough into two discs, wrap tightly, and refrigerate for at least one hour. This resting period lets flour hydrate fully and prevents shrinking during baking.
- Roll and prep your foundation:
- Roll one disc on a floured surface to fit your pie plate, press gently into place, trim edges, and return to refrigerator while preparing braids. Cold dough is essential for clean cuts and easy weaving.
- Cut your strips with confidence:
- Roll the second disc to 1/4 inch thickness and cut twelve long strips about 1/2 inch wide. Group them into sets of four strips, pinching tops together to anchor each bundle before braiding.
- Master the fishtail weave:
- Label strips 1 through 4 from left to right, then cross strip 1 over 2, under 3, and over 4. Repeat with whatever becomes the new leftmost strip, maintaining even tension until you reach the end.
- Apply and seal carefully:
- Transfer braids to chilled pie edge, pressing gently to adhere, using water as needed to help them stick. Trim excess dough and chill the assembled pie for 15 minutes to firm everything before baking.
- Finish with golden perfection:
- Brush braids with egg wash, adding milk for smoother application. If blind baking, line with parchment, fill with weights, and bake at 400°F until golden brown and beautifully crisp.
 Save
Save After mastering this technique, I started making tiny personal pies just so I could practice different braiding patterns. My daughter now requests 'the fancy one' for every birthday, and watching her carefully study the weaving pattern before taking that first bite reminds me why I fell in love with baking in the first place.
Temperature Control Secrets
The temperature of your ingredients makes or breaks pie crust. I keep my flour in the freezer during summer months and freeze my butter cubes for 15 minutes before starting. You want everything so cold that your hands ache slightly from handling it. This temperature difference creates steam pockets that separate dough layers into flaky perfection. If you notice butter softening or dough becoming sticky, immediately pop everything back in the refrigerator for 10 minutes.
Troubleshooting Common Issues
When braids pull apart during transfer, your strips are probably too thin or the dough has warmed. Reroll slightly thicker and work more quickly. If braids darken too quickly, reduce oven temperature by 25 degrees and shield loosely with foil. For uneven edges, gently press braids together with damp fingers before the final egg wash. The most common mistake I see is rushing the chilling steps between each stage.
Make-Ahead Mastery
You can prepare braided crusts up to a month in advance by freezing them flat between parchment paper. Bake from frozen, adding 5 minutes to blind baking time. I often braid while watching television, then freeze the finished pieces separately. This approach makes pie day feel luxurious rather than rushed.
- Brush frozen braids with egg wash before baking for the best color
- Thaw frozen dough overnight in refrigerator before rolling for easiest handling
- Label your frozen braids with dates because texture degrades after 3 months
 Save
Save There's something deeply satisfying about turning simple ingredients into edible art. Every time I present a fishtail-braided pie, someone asks how long it took, and I always smile and say 'A lifetime of practice and about 45 minutes today.'
Recipe FAQs
- → What makes fishtail braid different from regular braiding?
-
Fishtail braiding uses four strips instead of three, creating a flatter, wider woven pattern that resembles a fishtail. The technique involves crossing the leftmost strip over and under alternating strands, producing a delicate, intricate design perfect for pastry edges.
- → Can I make the dough ahead of time?
-
Absolutely. Prepare the pastry dough up to 3 days in advance and store it wrapped tightly in the refrigerator. You can also freeze the dough discs for up to 3 months. Thaw overnight in the refrigerator before rolling and braiding.
- → How do I prevent the braids from coming apart during baking?
-
Chill the assembled pie for at least 15 minutes before baking to firm the butter in the dough. Brush the bottom of braids lightly with water or egg wash before pressing onto the crust edge. This helps seal everything together as it bakes.
- → What fillings work best with this decorative crust?
-
This versatile crust complements both sweet and savory creations. Try it with apple, cherry, or berry pies for desserts, or use it with quiches, chicken pot pies, and vegetable tarts. The neutral buttery flavor enhances any filling without competing.
- → Can I use store-bought pie dough?
-
Yes, refrigerated pie dough works for this technique. Let it thaw according to package directions, then proceed with cutting strips and braiding. However, homemade dough typically yields better results as you can control the thickness and work with colder pastry.
- → How long does it take to master this technique?
-
Expect your first attempt to take 45-60 minutes, including prep and braiding. With practice, you'll become faster and more confident. The weaving motion becomes intuitive after 2-3 tries, making this an achievable skill for home bakers of any level.
