 Save
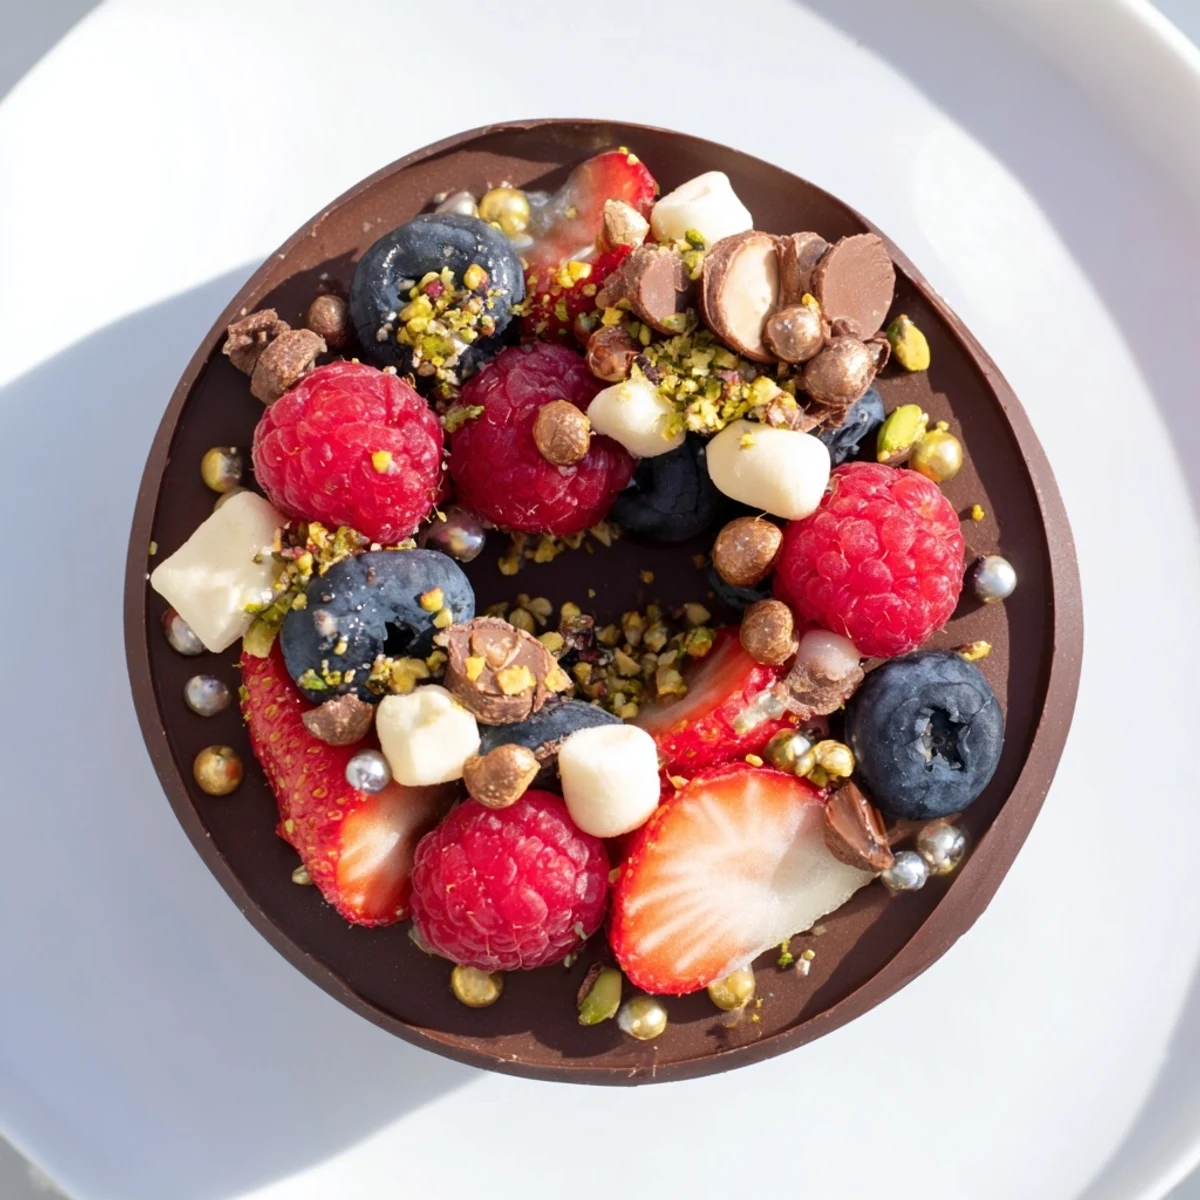
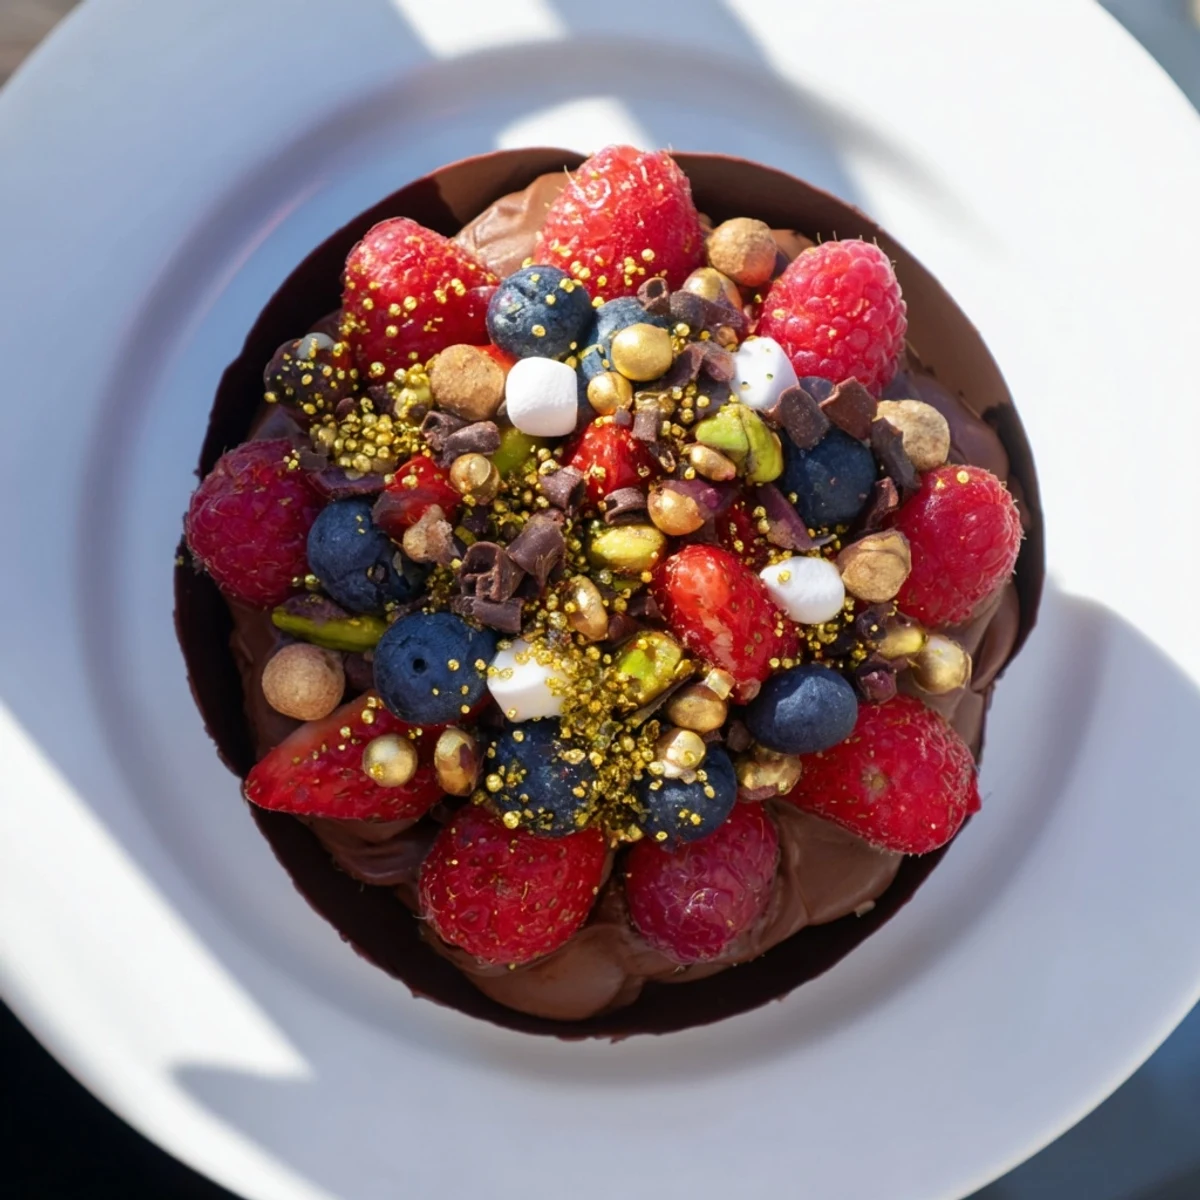
Save Create stunning chocolate grazing cups with rich dark chocolate mousse, fresh mixed berries, and gourmet toppings. These elegant desserts feature handmade chocolate cups filled with silky smooth mousse, then topped with seasonal fruits, chopped nuts, mini marshmallows, and decorative chocolate curls.
Perfect for dinner parties, weddings, or special celebrations, these individual portions offer guests a luxurious sweet treat experience. The combination of creamy chocolate mousse and fresh, crunchy toppings creates delightful texture contrasts.
Ready in just over an hour with mostly hands-off chilling time, these impressive desserts are easier to make than they appear. Customize toppings to match your occasion or seasonal preferences.
The night before my sister's wedding, we found ourselves in her tiny kitchen at midnight making chocolate cups. We were supposed to be sleeping, but stress baking took over, and those delicate chocolate vessels became our meditation. One cracked cup led to laughter instead of tears, and somehow that imperfection made the final dessert feel more special.
I served these at my book club last month, and everyone spent ten minutes just admiring them before taking a bite. The chocolate cups catch the light beautifully, and theres something magical about holding an edible vessel in your hands. Watching friends choose their own toppings turned dessert into an interactive experience.
Ingredients
- Dark Chocolate (at least 60% cocoa): Higher cocoa percentage means your cups will hold their shape better and taste less cloyingly sweet. I have learned the hard way that cheap chocolate seizes and refuses to cooperate.
- Heavy Cream: Very cold cream whips up faster and holds air better. Leave it in the back of your refrigerator for at least a few hours before starting.
- Powdered Sugar: This dissolves instantly into the cream without leaving grainy spots like granulated sugar might.
- Vanilla Extract: Pure vanilla makes a noticeable difference here since the flavors are so simple and clean.
- Fresh Mixed Berries: Use whatever looks most vibrant at the market. The tartness cuts through all that rich chocolate perfectly.
- Chopped Nuts: Toast them briefly in a dry pan beforehand to wake up their oils. That extra step is worth every second.
- Mini Marshmallows: These add whimsy and texture contrast. The kids (and honest adults) always pick these off first.
- Chocolate Curls or Shavings: Use a vegetable peeler on room temperature chocolate to make these. They look harder than they actually are.
- Edible Gold Leaf or Pearls: Completely unnecessary but absolutely stunning if you are feeling extra fancy for a special occasion.
Instructions
- Craft the Chocolate Cups:
- Melt your chocolate in 30 second bursts, stirring between each interval until it flows like warm honey. Working quickly, paint the inside of six cupcake liners with an even layer, paying special attention to the bottoms where cracks tend to form. Chill for 20 minutes until they click when you tap them, then gently peel away the liners.
- Whip Up the Mousse:
- Melt the remaining chocolate and let it cool until it feels slightly warm to the touch. Whip your cold cream with sugar and vanilla until soft peaks droop from your whisk, then fold in a dollop of cream into the chocolate before gently combining the two mixtures. The key is folding until just combined. Overworking will deflate your mousse into something much less airy.
- Assemble with Care:
- Pipe or spoon your mousse into each chocolate cup, leaving room at the top for those gorgeous toppings. Arrange your berries, nuts, and marshmallows like you are creating tiny edible landscapes. Let your creativity guide you here.
- Final Chill:
- Refrigerate everything for at least 20 minutes so the mousse sets properly. This also helps the chocolate cups firm up again after handling them at room temperature.
 Save
Save These have become my go to when I want to impress without spending all day in the kitchen. Something about the individual portions makes people feel taken care of, like I made something just for them.
Making Ahead
You can prepare the chocolate cups and mousse separately up to a day in advance. Store the cups between layers of parchment paper in an airtight container, and keep the mousse covered in the refrigerator. Assemble everything shortly before serving for the best texture and appearance.
Customization Ideas
White chocolate cups with raspberry mousse look stunning and taste completely different. For a boozy version, fold a tablespoon of orange liqueur or coffee liqueur into the mousse before chilling. The alcohol actually helps stabilize the foam slightly.
Serving Suggestions
These shine brightest when set out on a grazing table alongside other small desserts. The visual impact of six identical cups arranged on a pretty platter is genuinely striking. Consider adding a small sign listing the toppings so guests with allergies know what they are reaching for.
- Position these where the light catches the chocolate gloss
- Provide tiny spoons instead of forks for easier eating
- Have extra toppings on the side for people who want to customize
 Save
Save Every time I make these, I am reminded that the most memorable desserts are the ones that make people slow down and savor. Something about holding your own chocolate cup demands that kind of attention.
Recipe FAQs
- → How far in advance can I make these chocolate cups?
-
Best made on the day of serving for optimal texture and freshness. The chocolate cups can be prepared 1-2 days ahead and stored in an airtight container. Assemble with mousse and toppings 2-4 hours before serving to maintain the crispy cup texture.
- → Can I use milk or white chocolate instead of dark?
-
Absolutely. Milk or white chocolate works beautifully for both cups and mousse. Note that white chocolate requires gentler melting as it seizes more easily. Adjust powdered sugar in mousse accordingly since milk and white varieties are sweeter.
- → What other toppings work well with these grazing cups?
-
Consider seasonal fruits like sliced figs, pomegranate seeds, or poached pears. Crushed cookies, pretzels, or toffee pieces add crunch. Edible flowers, candied citrus peel, or flavored whipped cream dollops elevate the presentation for special occasions.
- → How do I prevent the chocolate cups from cracking when removing liners?
-
Ensure chocolate is completely set before attempting removal. Chill for at least 20-30 minutes. Gently peel liners starting from the top edge, working slowly. If cups stick, place in freezer for 5 minutes to firm further before removing.
- → Can I make these without cupcake liners?
-
Small silicone molds, mini tart pans, or even inverted silicone ice cube trays work as alternatives. For freeform cups, pipe chocolate circles onto parchment paper, shape into cups using the back of a spoon, and chill until set.
- → What's the best way to melt chocolate without seizing?
-
Melt slowly using 50% power in 30-second intervals, stirring between each. Alternatively, use a double boiler with barely simmering water—ensure no water contacts the chocolate. Add a teaspoon of coconut oil or butter if needed for smoother consistency.
