 Save
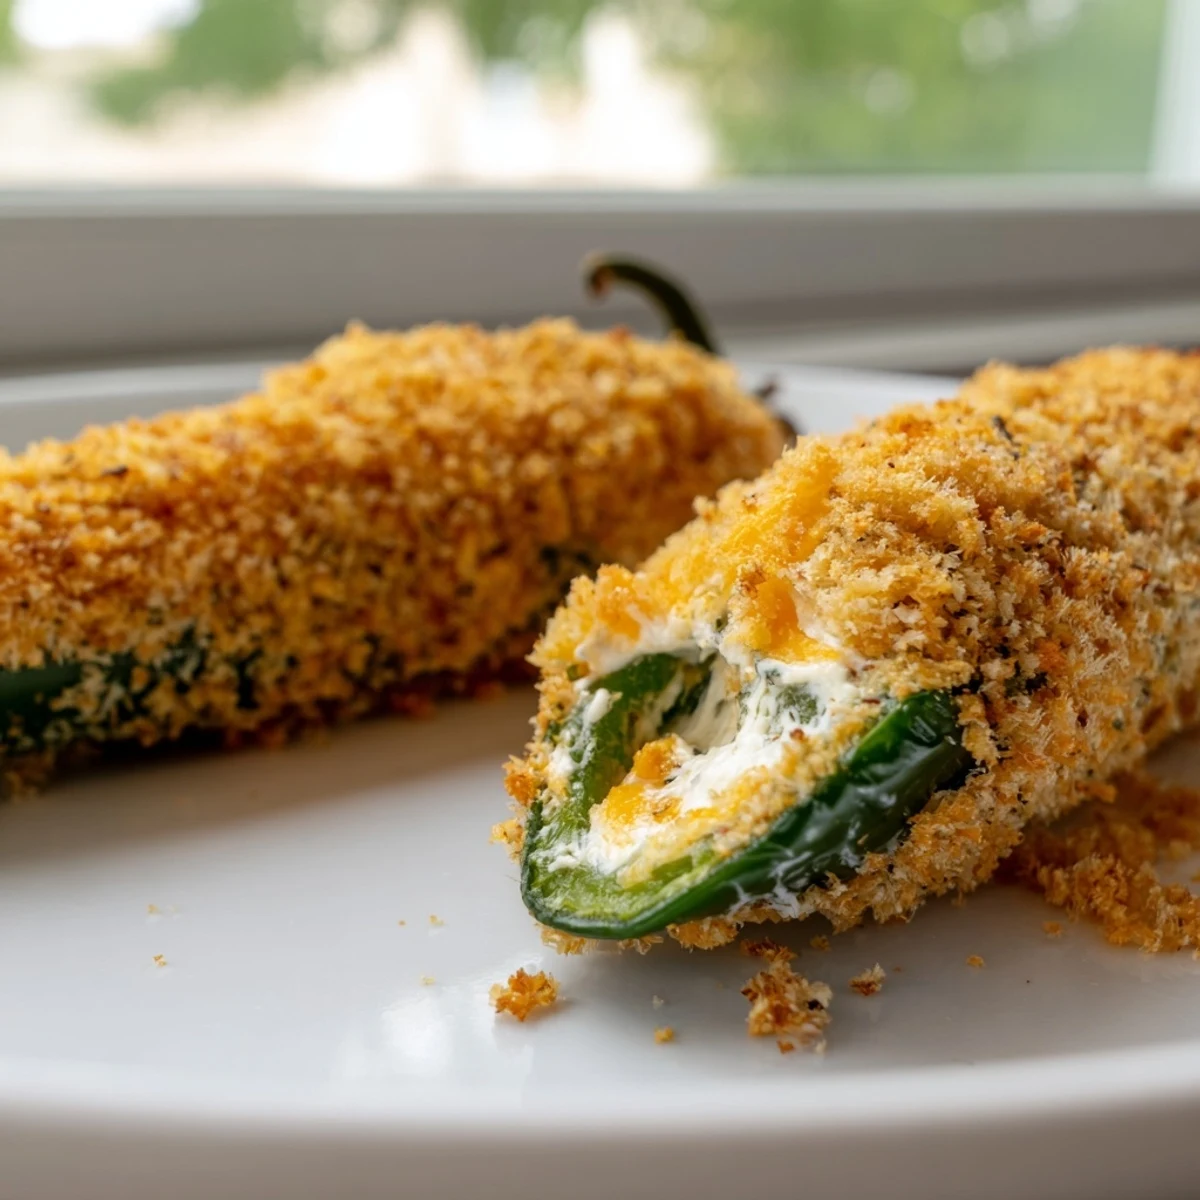
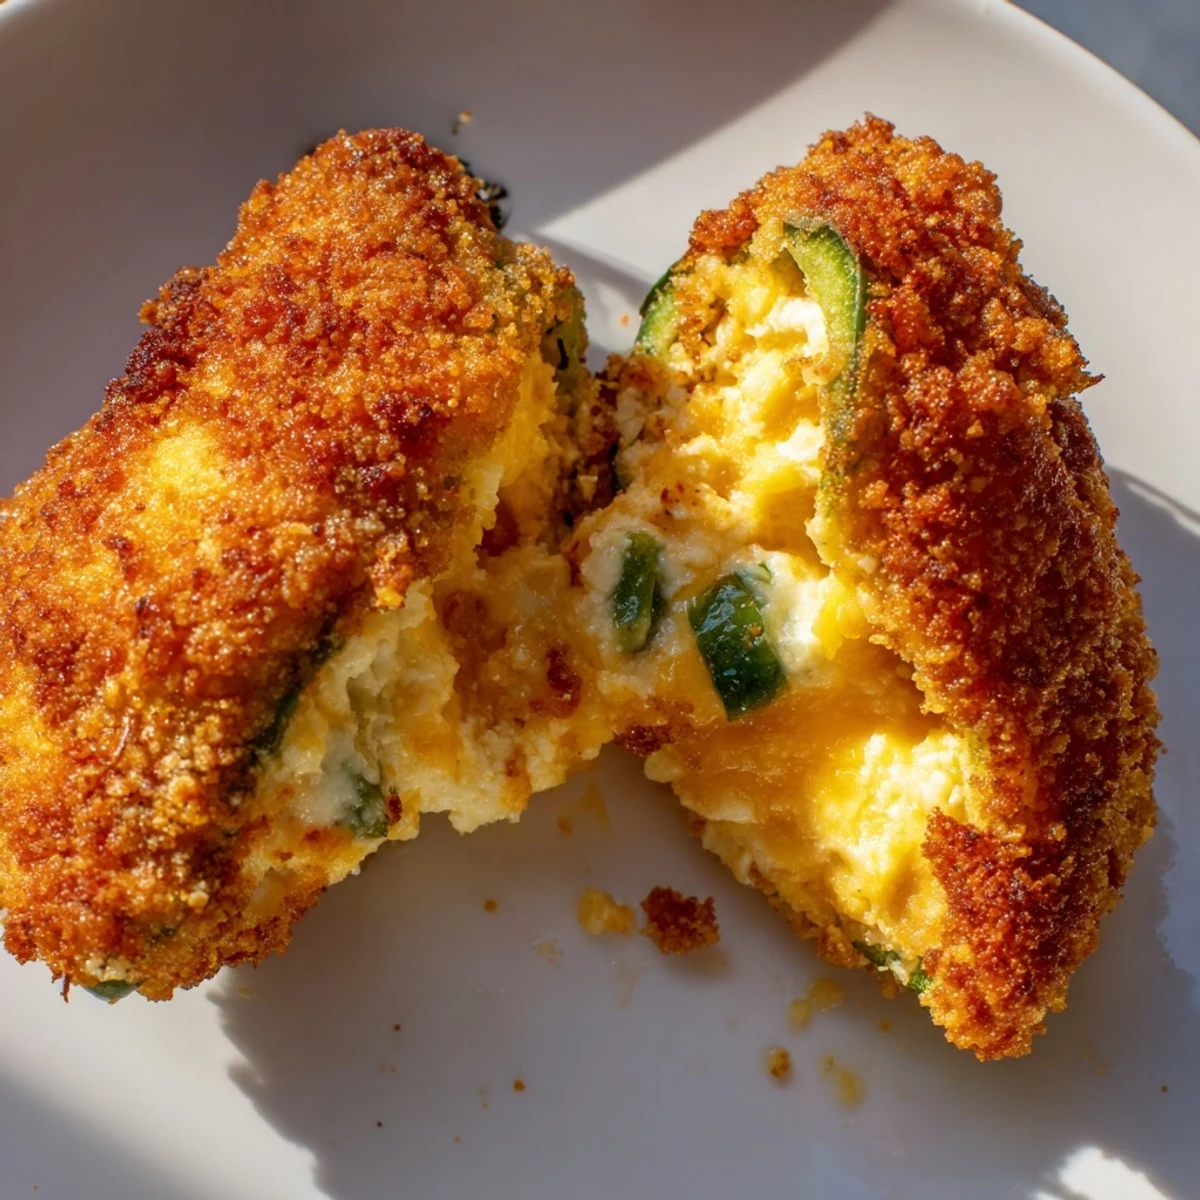
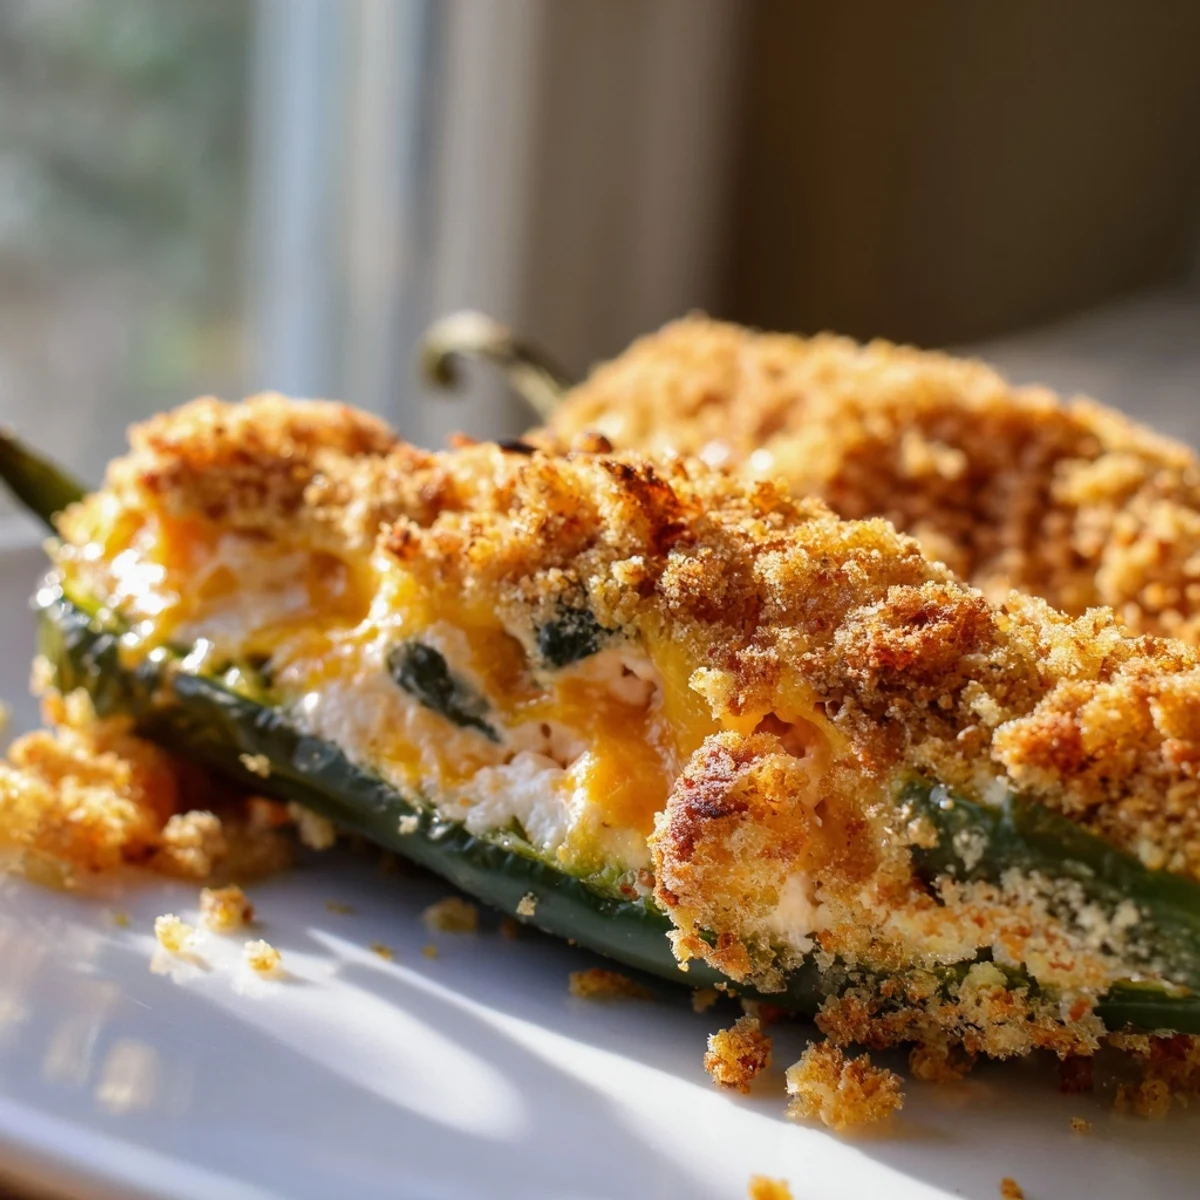
Save These spicy jalapeño poppers are halved and deseeded before being filled with a rich mixture of cream cheese, sharp cheddar, garlic, and spring onions. Topped with crispy breadcrumbs and baked until bubbly, they offer a perfect balance of heat and creaminess. Finished with a hint of smoked paprika, they make an ideal appetizer for serving hungry guests.
I discovered the magic of jalapeño poppers at a backyard cookout where my neighbor casually pulled a golden tray from the oven and everyone immediately abandoned their hamburgers. The combination of creamy, tangy cheese with that sharp jalapeño bite was electric, and I realized I'd been missing out on one of the easiest appetizers to make at home. Now they're my go-to when I need something that looks fancy but requires barely any effort.
Last summer, I made these for a small gathering, and my friend Sarah—who doesn't usually go for spicy food—ate four in a row without realizing it. She kept saying she'd just try one more, and by the end of the night, the whole tray was gone. That's when I knew this recipe was a keeper, even for people who think they don't like heat.
Ingredients
- Fresh jalapeño peppers (8 large): Choose ones that are firm and bright green; they'll hold their shape better during baking and have a fresher bite.
- Cream cheese (200 g), softened: Let it sit on the counter for 20 minutes before mixing so it blends smoothly without lumps.
- Sharp cheddar cheese, grated (75 g): The sharpness cuts through the richness and adds a subtle tang that makes the whole filling sing.
- Spring onion (1), finely chopped: It adds a gentle oniony freshness that keeps the filling from feeling one-dimensional.
- Garlic (1 clove), minced: A single clove is enough; too much and it overpowers everything else.
- Fresh cilantro (1 tbsp), optional: If you love cilantro, it brightens the filling with a herbaceous note that pairs beautifully with the spice.
- Smoked paprika (1/2 tsp): This is the secret weapon that adds depth and a hint of smokiness without extra heat.
- Breadcrumbs (50 g) and olive oil (1 tbsp): Toss these together for a golden, crispy topping that gives textural contrast to the creamy filling.
Instructions
- Prepare your workspace:
- Preheat the oven to 200°C (400°F) and line a baking sheet with parchment paper. This takes just a minute but saves cleanup time later.
- Halve and deseed the peppers:
- Slice each jalapeño lengthwise, then use a small spoon to carefully scoop out the seeds and white membranes where most of the heat lives. Wear gloves unless you enjoy having burning fingers for the rest of the evening.
- Make the filling:
- In a bowl, combine the softened cream cheese, grated cheddar, chopped spring onion, minced garlic, cilantro if using, smoked paprika, salt, and pepper. Stir until everything is evenly mixed and smooth.
- Stuff the peppers:
- Spoon the filling generously into each jalapeño half, smoothing the top with the back of your spoon so it's even and inviting.
- Add the crunch (optional):
- If you want that crispy texture, mix the breadcrumbs with olive oil and sprinkle it over the filled peppers. This step makes them look restaurant-quality and adds a satisfying crunch.
- Bake until golden:
- Arrange the stuffed peppers on the baking sheet and bake for 18–20 minutes until the filling is bubbly and the breadcrumbs are golden brown. Your kitchen will smell amazing.
- Cool before serving:
- Let them rest for 5 minutes so the filling sets slightly and you don't burn the roof of your mouth on melted cheese.
 Save
Save My most memorable moment with these was when my partner, who has zero tolerance for spicy food, cautiously bit into one and then immediately reached for milk. But instead of regretting it, he asked me to make them less spicy next time—which meant he actually wanted me to make them again. That's when I realized how forgiving and adaptable this recipe really is.
Playing with Heat
The beauty of jalapeño poppers is that you control the spice level at every step. Leave some seeds in for serious heat, swap the cheddar for pepper jack if you want to turn up the burn, or choose milder peppers entirely if you're cooking for a crowd with varying tolerance levels. I've made them all three ways, and each version has its moment.
Serving and Pairing
These are perfect on their own, but a dollop of cool sour cream or ranch dip on the side transforms them into something you can't stop eating. The coldness of the dip against the warm, spicy pepper is genuinely one of those small kitchen revelations that changes how you approach appetizers.
Make Them Your Own
Once you nail the basic formula, you have endless room to experiment. I've added crispy bacon, swapped in different cheeses, even tried a version with a pinch of cumin for a southwestern vibe. The filling is forgiving, so don't be afraid to play around.
- For a gluten-free version, simply skip the breadcrumb topping or use certified gluten-free breadcrumbs.
- Prep the peppers up to 4 hours ahead; store them covered in the fridge and bake just before serving for maximum freshness.
- These reheat beautifully in a 160°C (320°F) oven for about 8 minutes if you have leftovers, though honestly they rarely last that long.
 Save
Save These jalapeño poppers have become my secret weapon for any gathering, and I hope they become yours too. There's something special about serving food that's both impressive and genuinely, unapologetically delicious.
Recipe FAQs
- → How do I reduce the heat level?
-
Remove all white membranes and seeds from the jalapeño halves before filling them to significantly lower the spice.
- → Can I fry these instead of baking?
-
Yes, you can coat the stuffed peppers in batter or breadcrumbs and deep fry them until golden and crispy.
- → What cheese works best for the filling?
-
Cream cheese provides the base texture, while sharp cheddar adds flavor. Pepper jack is a great alternative for extra spice.
- → Can I prepare these ahead of time?
-
Yes, you can stuff the peppers up to 24 hours in advance. Keep them refrigerated and bake just before serving.
- → How do I make them gluten-free?
-
Use certified gluten-free breadcrumbs for the coating or simply omit the breadcrumb topping for a naturally gluten-free version.
