 Save
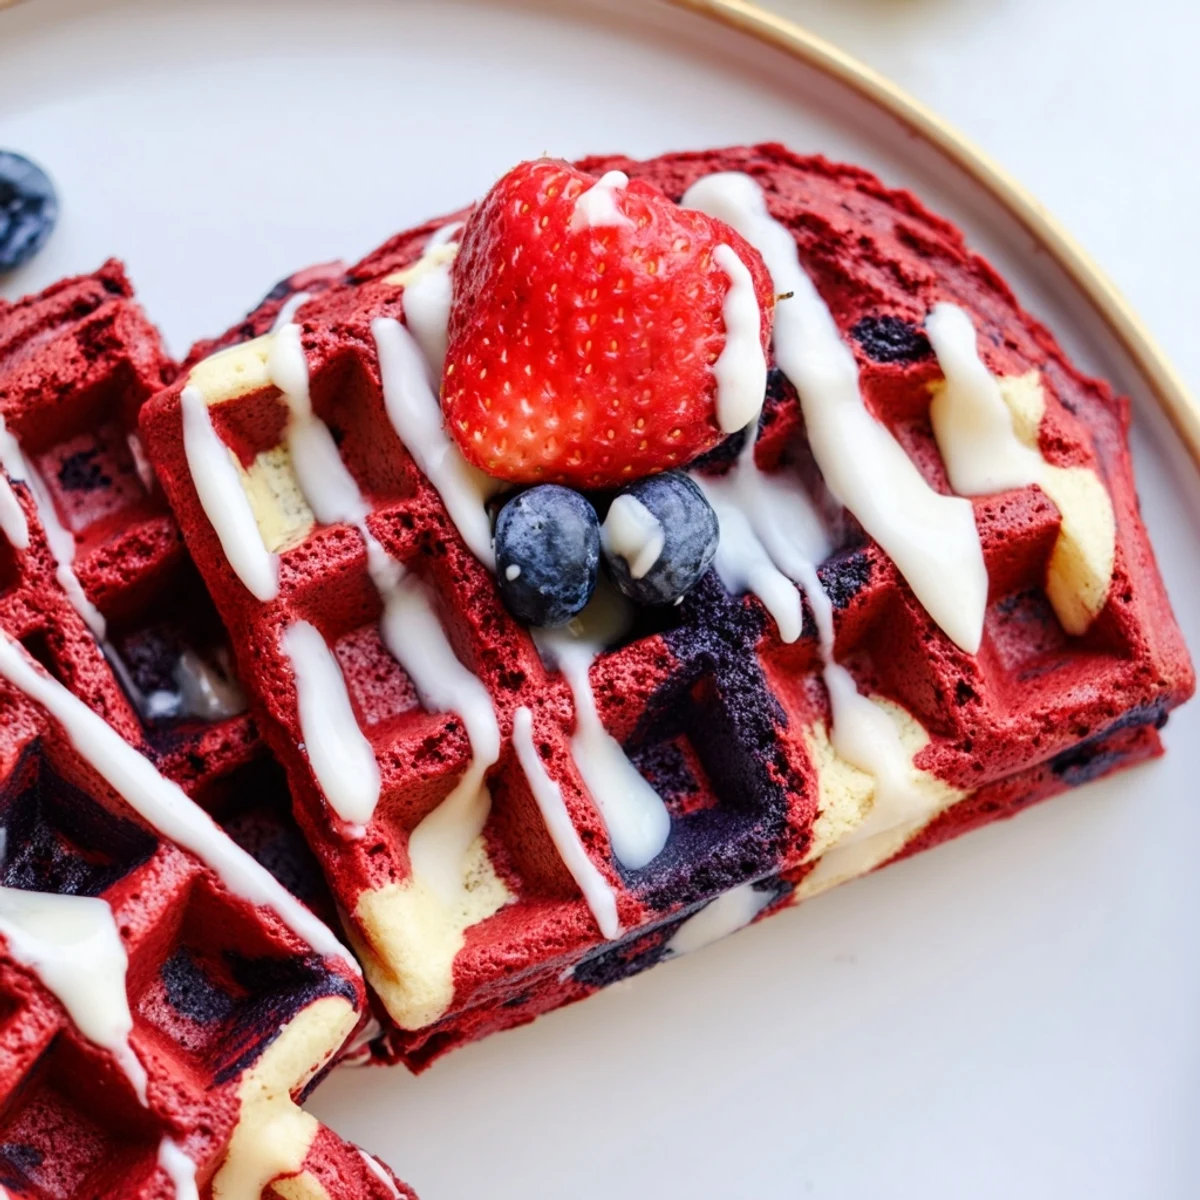
Save These red velvet marble waffles combine rich cocoa-infused batter with classic vanilla, swirled together for a stunning presentation. The buttermilk base ensures light, fluffy interiors while achieving crispy golden exteriors in your waffle iron. Each batch creates that signature marble pattern by alternating dollops of crimson and cream-colored batters, then gently swirling with a knife. The result delivers the familiar tangy sweetness of red velvet cake in waffle form - ideal for topping with cream cheese glaze, fresh berries, or maple syrup. Ready from start to finish in just 30 minutes, this breakfast brings bakery-worthy elegance to home cooking while keeping preparation simple enough for any weekend morning.
The morning sun hit my kitchen counter just right when I first attempted these waffles, and I remember staring at the swirling red and white batter like it was some kind of edible magic trick. My daughter leaned over the counter, eyes wide, asking if I was making waffles or cupcakes for breakfast. That question pretty much cemented this recipe in our weekend rotation forever.
Last Valentine's Day, I made a double batch and the smell of warm vanilla and cocoa filled the entire house. My husband took one bite, looked at me with this genuinely surprised expression, and asked why we ever bother going out for brunch when these exist.
Ingredients
- 2 cups all-purpose flour: The foundation that gives these waffles their classic fluffy interior and crisp exterior
- 2 tbsp granulated sugar: Just enough sweetness to balance the tang of buttermilk without making them dessert-like
- 2 tsp baking powder: Essential for that beautiful rise that makes waffles light instead of dense
- 1/2 tsp baking soda: Works with the buttermilk to create extra lift and tenderness
- 1/4 tsp salt: Enhances all the flavors and keeps them from tasting flat
- 1 3/4 cups buttermilk, room temperature: The secret ingredient for tanginess and an incredibly tender crumb
- 2 large eggs: Room temperature eggs incorporate better and help structure the waffle
- 4 tbsp unsalted butter, melted and slightly cooled: Adds richness and helps create that crispy exterior we all want
- 1 tsp vanilla extract: Pure vanilla makes the plain batter sing against the chocolate swirl
- 2 tbsp unsweetened cocoa powder: Deepens the red velvet flavor without making it too chocolate-forward
- 1 tbsp red food coloring: Gel coloring works best for that vibrant red without thinning your batter
Instructions
- Mix the dry foundation:
- Whisk together flour, sugar, baking powder, baking soda, and salt in a large bowl until everything is evenly distributed and no clumps remain
- Combine the wet ingredients:
- In a separate bowl, whisk buttermilk, eggs, melted butter, and vanilla extract until completely smooth and emulsified
- Gently bring them together:
- Fold the wet mixture into the dry ingredients just until combined, some small lumps are okay and actually mean you did not overmix
- Create the two batters:
- Divide batter evenly between two bowls, then whisk cocoa powder and red food coloring into one bowl until you have that signature deep red velvet color
- Heat your waffle iron:
- Preheat according to manufacturer instructions and lightly grease with oil or nonstick spray
- Make the marble magic happen:
- Dollop alternating spoonfuls of red velvet and vanilla batters onto the hot iron, then use a chopstick or butter knife to gently swirl them together for that gorgeous marbled effect
- Cook to golden perfection:
- Close the lid and cook until waffles are golden, crisp, and cooked through, about 3 to 5 minutes per batch depending on your iron
- Serve them up:
- Plate warm with cream cheese glaze, maple syrup, or fresh fruit whatever makes your weekend heart happy
 Save
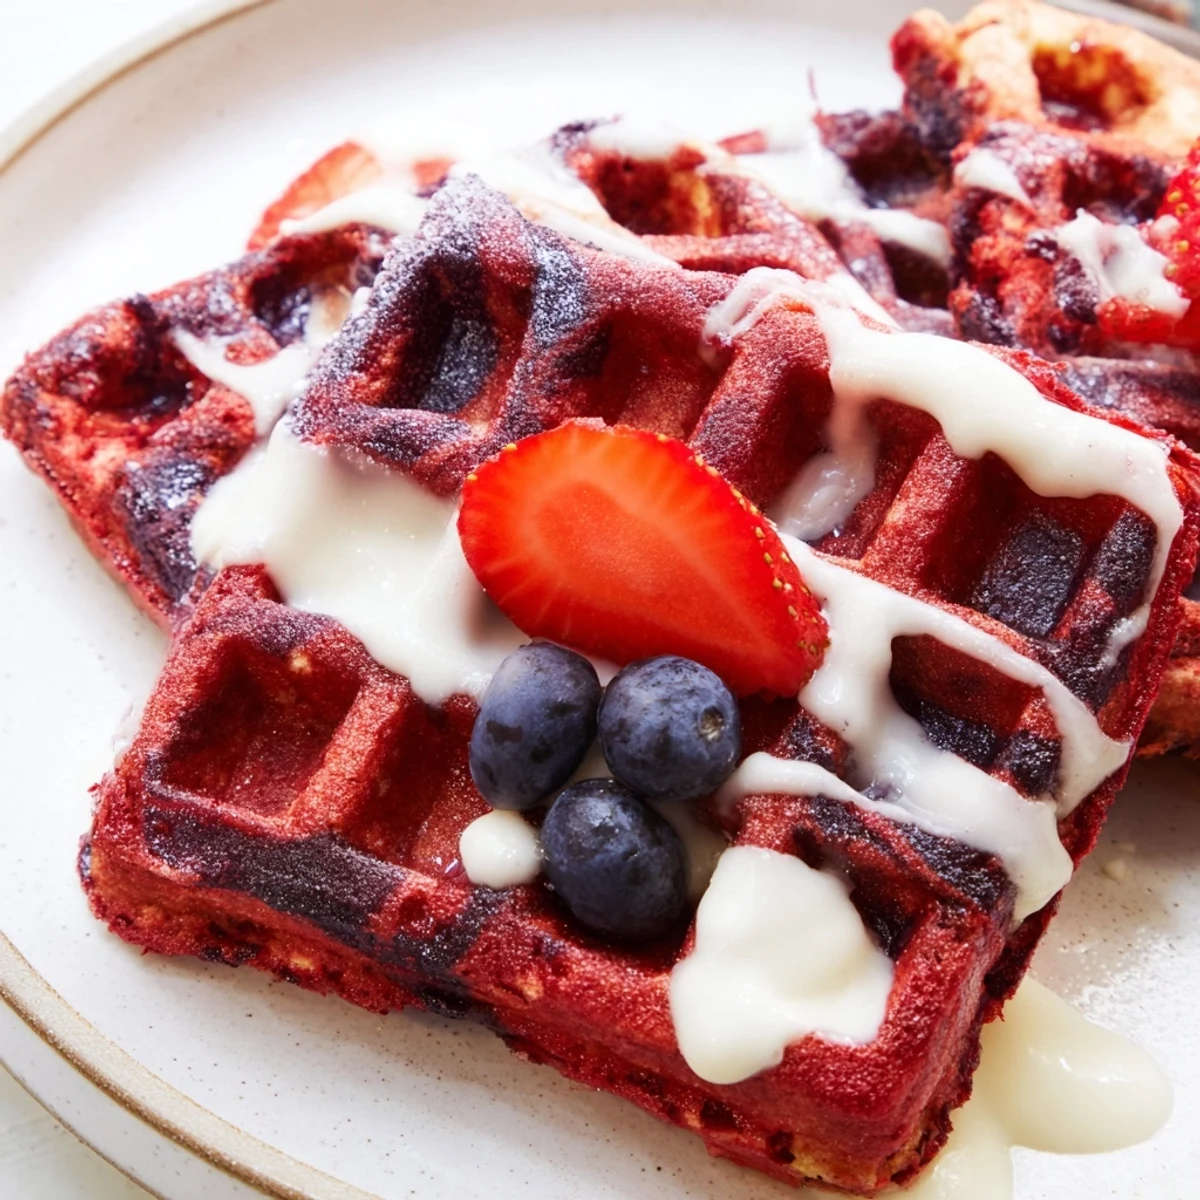
Save These waffles have become our go-to when we want to turn a regular Saturday into something that feels like a celebration without any of the fuss. The way the red and vanilla swirl together on the plate still makes me smile every single time.
Make-Ahead Magic
I have learned that you can mix the dry and wet ingredients separately the night before and store them in the refrigerator. Just give the wet mixture a good whisk in the morning and combine them with the red velvet swirl right before cooking.
Freezing For Later
After making a double batch, I let any extra waffles cool completely on a wire rack, then freeze them in a single layer before transferring to a freezer bag. They reheat beautifully in the toaster for those rushed weekday mornings.
Cream Cheese Glaze Perfection
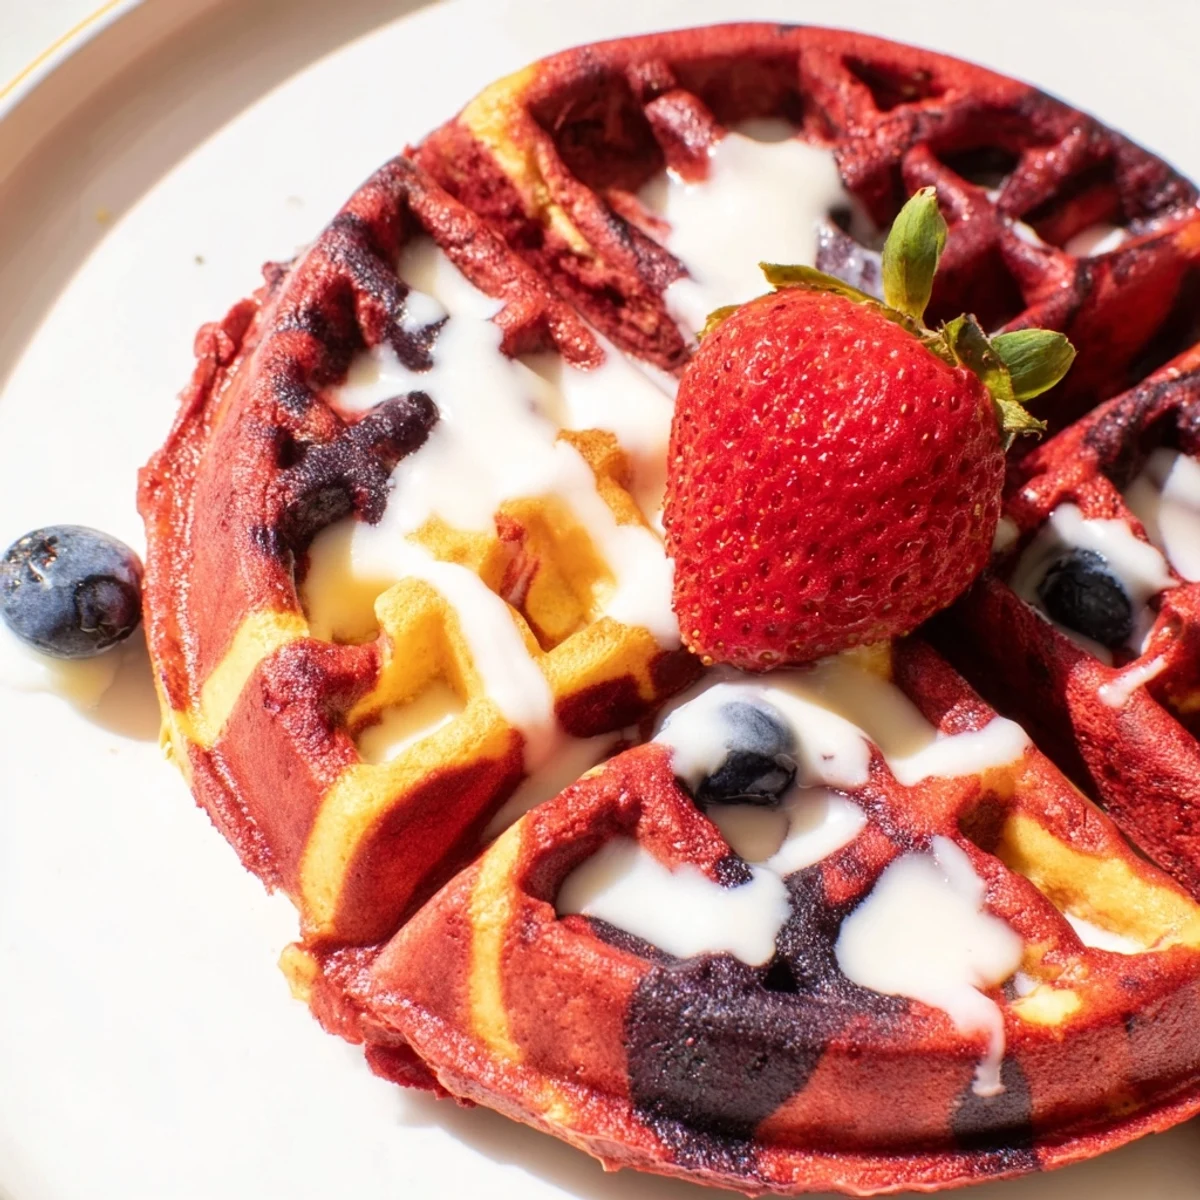
While the waffles cook, I whisk together 1/4 cup softened cream cheese, 2 tablespoons milk, and 1/2 cup powdered sugar until smooth and drizzle-worthy. The contrast between the warm waffle and cool tangy glaze is honestly the reason these became legendary in our house.
- Warm the cream cheese slightly for 15 seconds in the microwave if it is too cold to whisk smoothly
- Add more milk one teaspoon at a time if you want a thinner glaze that really soaks into the waffle
- Make the glaze right before serving so it stays fresh and pourable
 Save
Save Weekend mornings just got a whole lot more beautiful, and honestly, that marble pattern never gets old.
Recipe FAQs
- → How do I get the marble effect in the waffles?
-
Spoon alternating dollops of red velvet and vanilla batters onto your waffle iron, then use a chopstick or butter knife to gently swirl them together. Don't over-swirl - just 2-3 light motions create that beautiful marbled pattern without mixing the colors completely.
- → Can I make these waffles ahead of time?
-
Yes, you can prepare both batters the night before and store them separately in the refrigerator. Give each batter a quick stir before using, as they may thicken slightly overnight. Alternatively, cook all waffles in advance and reheat in a toaster oven at 350°F for 5 minutes to restore crispiness.
- → What toppings work best with red velvet marble waffles?
-
Cream cheese glaze is the classic choice, complementing the tangy red velvet flavors perfectly. Fresh strawberries or raspberries add bright contrast, while whipped cream provides extra indulgence. For simpler toppings, warm maple syrup or a dusting of powdered sugar lets the marble pattern shine through.
- → Why do I need buttermilk in this recipe?
-
Buttermilk's acidity activates the baking soda, creating extra lift for light, fluffy waffles. It also adds tanginess that balances the sugar and enhances the cocoa flavor in the red velvet portion. If unavailable, Greek yogurt thinned with milk makes an excellent substitute with similar results.
- → Can I use natural food coloring instead of red dye?
-
Beet juice or pomegranate juice can replace artificial red food coloring, though the color will be more subtle. Start with 1 tablespoon and add more as needed. Powdered freeze-dried strawberries also work - grind 2-3 tablespoons into a fine powder and mix into the cocoa portion for natural pink-red hues.
- → What's the best way to tell when the waffles are done?
-
Most waffle irons have a built-in indicator light that signals when cooking is complete. Otherwise, wait 3-5 minutes until steam stops rising from the edges. The waffle should feel crisp when touched lightly and release easily from the iron without sticking.
