 Save
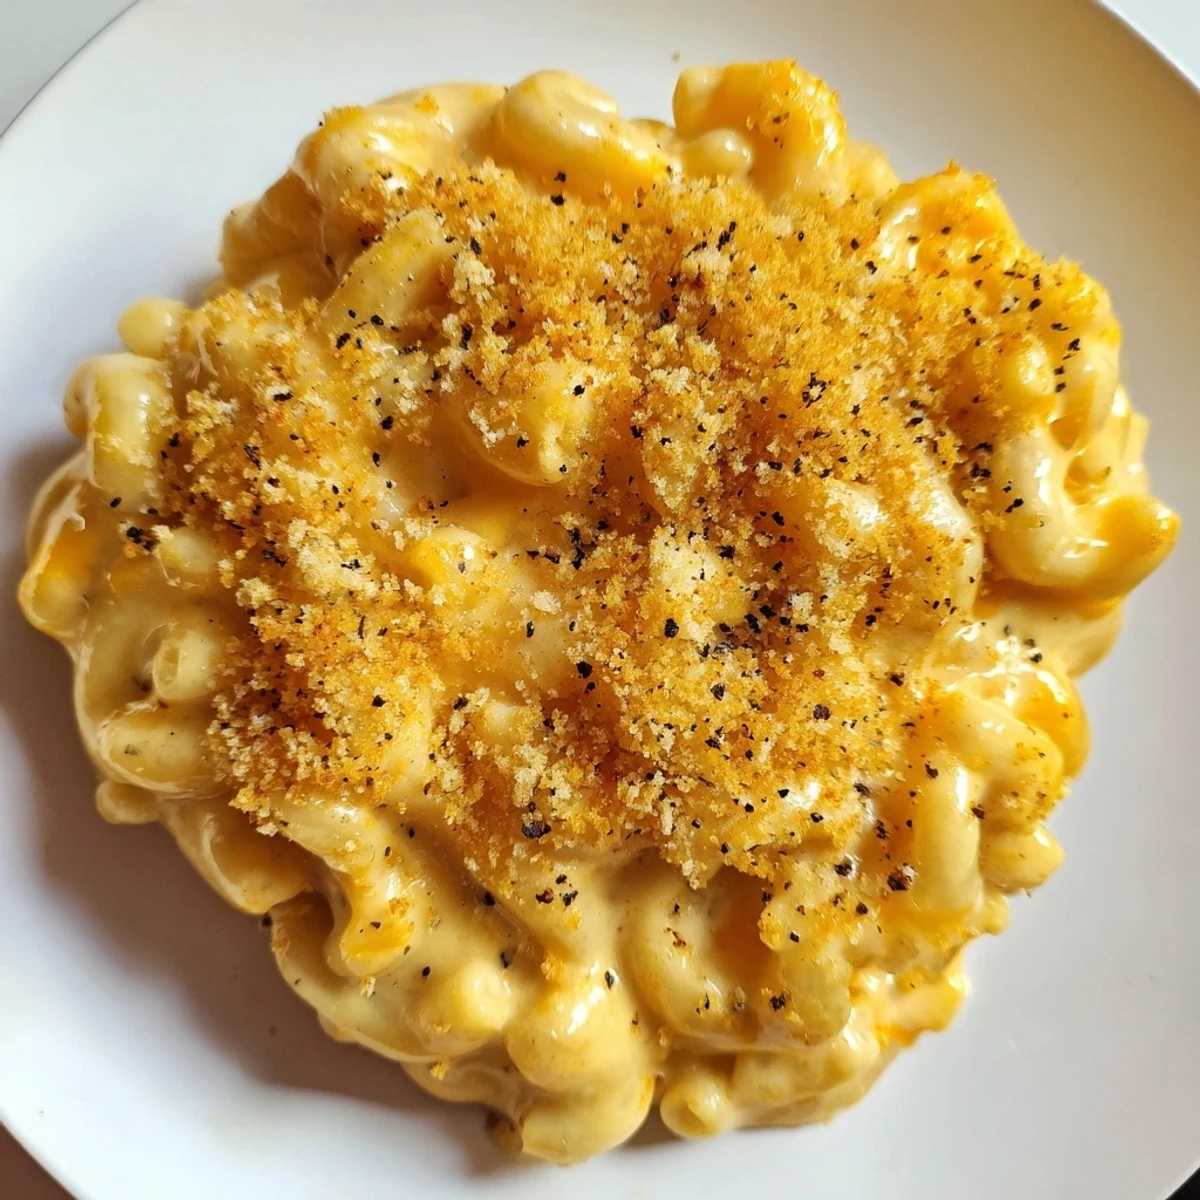
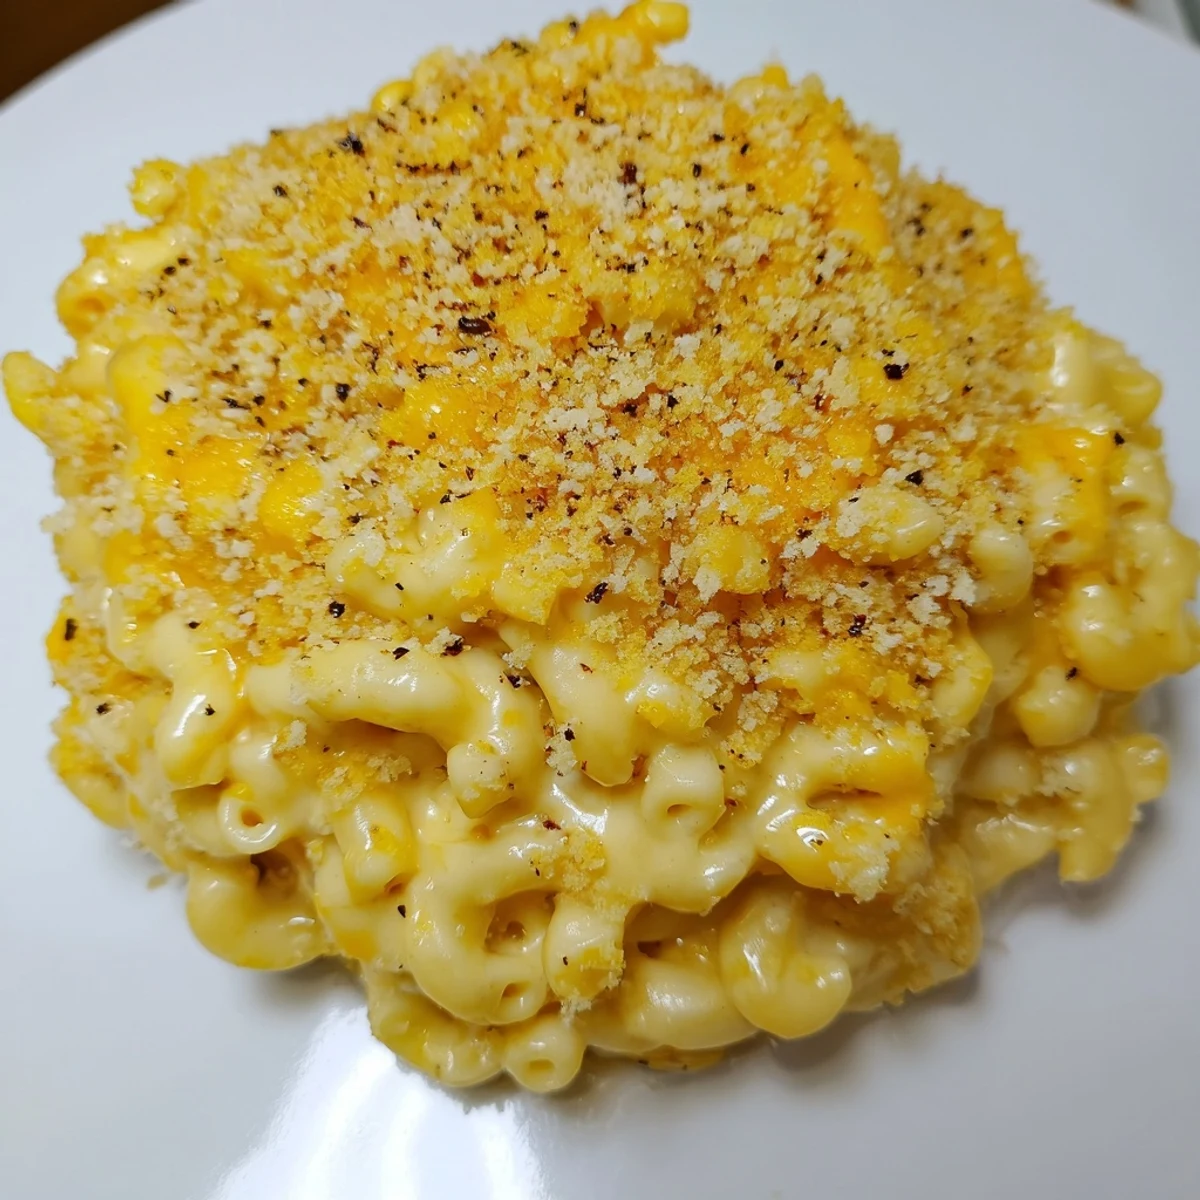
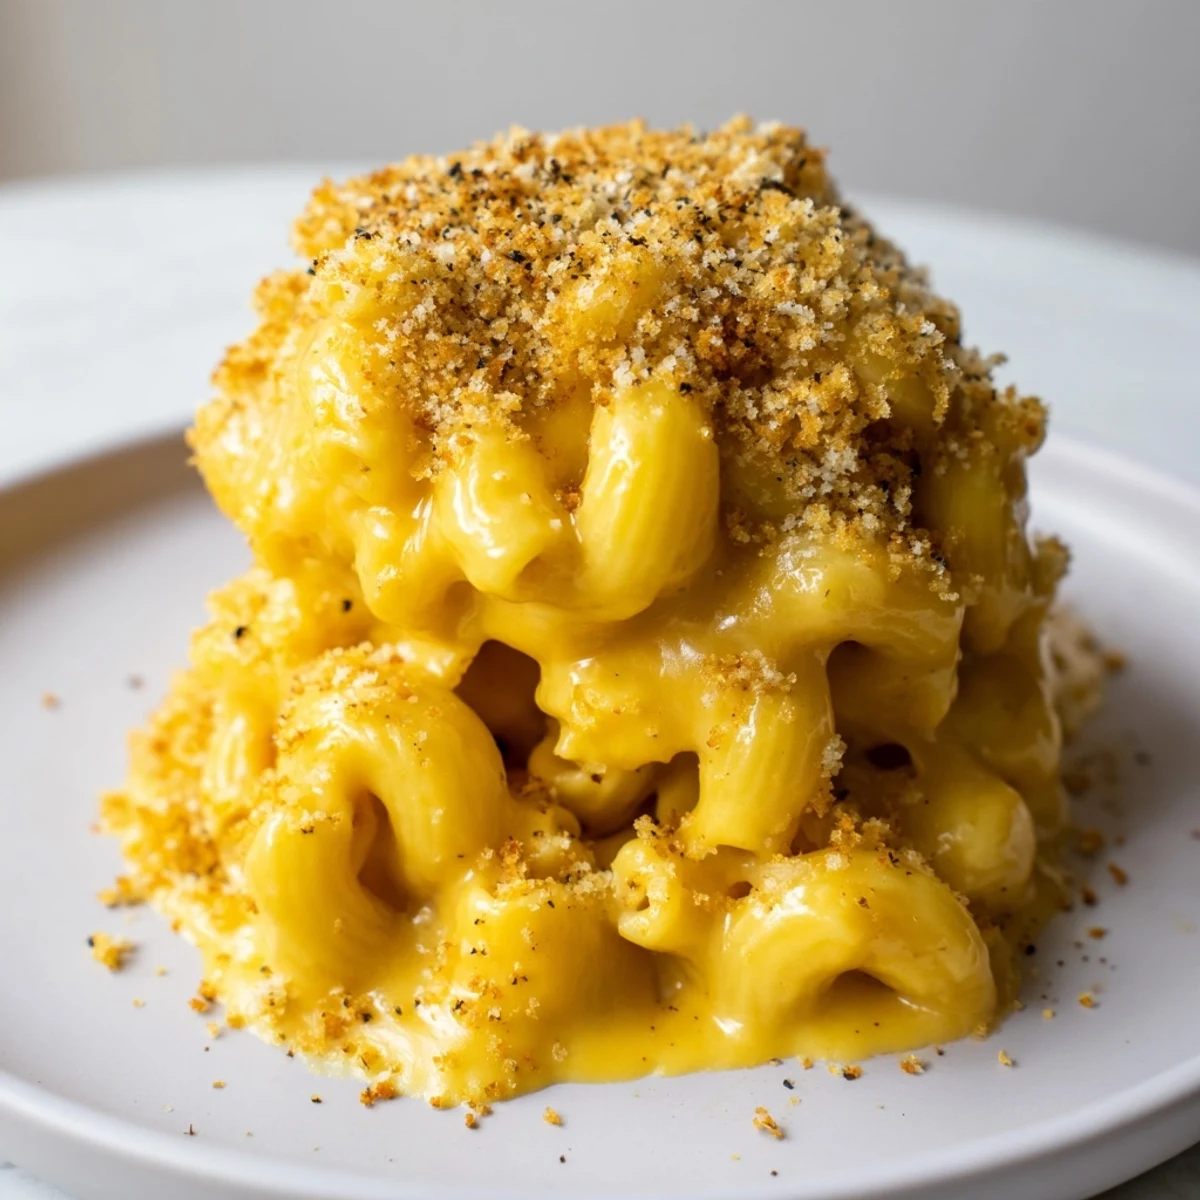
Save Al dente elbow pasta is combined with a milk-based sauce thickened with a roux, then sharp and mild cheddar are stirred in until silky. Fold pasta into the sauce, season with Dijon, and transfer to a dish if baking. Top with buttered breadcrumbs and bake until golden for a crisp finish. Variations include bacon, sautéed onions, or Gruyère; use gluten-free flour and pasta for a wheat-free option. Serves four.
There is something about the sound of a whisk scraping against a saucepan that instantly puts me at ease, and mac and cheese is the dish that taught me that. My sister used to make it from a box every Saturday, but one rainy afternoon I decided to try it from scratch and never looked back. The smell of sharp cheddar hitting a hot roux is the kind of thing that makes everyone wander into the kitchen asking when dinner is ready. This version is simple, honest, and exactly what comfort food should be.
I made this for a friend who was going through a rough patch and showed up at her door with the whole baking dish still warm, wrapped in a towel. She did not say much at first, just stood there holding the dish and breathing in that unmistakable cheesy aroma. We ate straight from the pan with two forks and barely said a word, and somehow that said everything.
Ingredients
- Elbow macaroni (300 g): The classic shape holds sauce in every curve, but any small pasta works in a pinch.
- Whole milk (2 cups): Whole milk is nonnegotiable here because the fat content is what gives the sauce its silky body.
- Unsalted butter (2 tbsp): Using unsalted lets you control the seasoning without any surprises.
- All-purpose flour (2 tbsp): This is the thickening backbone of your sauce, so measure carefully and cook it out fully.
- Sharp cheddar cheese (1 cup, grated): Sharp cheddar brings the bold, tangy punch that makes the sauce memorable.
- Mild cheddar cheese (1 cup, grated): Mild cheddar melts more smoothly and balances the sharpness beautifully.
- Dijon mustard (1/2 tsp): A tiny amount deepens the cheese flavor without making it taste like mustard at all.
- Salt and black pepper: Season gradually and taste as you go because cheese already brings its own salt.
- Breadcrumbs (1/4 cup, optional): A crunchy topping transforms the texture and makes it feel like a proper baked dish.
- Melted butter (1 tbsp, optional): Tossed with breadcrumbs for a golden, buttery crust.
- Parmesan cheese (2 tbsp, grated, optional): Adds a savory nuttiness to the topping that people always notice and love.
Instructions
- Get the oven ready if you are baking:
- Preheat to 180 degrees Celsius (350 degrees Fahrenheit) so it is hot and waiting when you need it. Skip this step if you prefer the stovetop version.
- Cook the pasta until just tender:
- Boil the macaroni in well salted water until al dente, then drain it immediately so it does not go soft. The pasta will absorb sauce later, so slightly firm is exactly what you want.
- Build the roux:
- Melt the butter in a saucepan over medium heat, then whisk in the flour and stir constantly for one full minute. You are looking for a pale golden paste that smells faintly toasted, not browned.
- Add the milk slowly:
- Pour the milk in gradually while whisking so no lumps form, then let it simmer until it thickens enough to coat the back of a spoon, about four to five minutes. Stay patient and keep stirring because this is where the magic happens.
- Melt in the cheese:
- Lower the heat and stir in both cheddars and the Dijon mustard until the sauce is smooth and glossy. Season with salt and pepper, tasting as you go.
- Combine pasta and sauce:
- Fold the cooked macaroni into the cheese sauce gently so every piece is coated evenly. At this point it is already ready to eat if you cannot wait.
- Bake with the topping if desired:
- Transfer the mixture to a greased baking dish, scatter the buttery breadcrumb and parmesan mixture over the top, and bake for fifteen to twenty minutes until golden and bubbling at the edges.
- Serve while hot:
- Scoop into bowls immediately because the sauce is at its most luscious right out of the oven or pan. A brief rest of two minutes makes it easier to eat without burning your tongue.
 Save
Save One Thanksgiving I brought this as a side dish, fully expecting the turkey and pies to steal the show, but it was the first thing emptied and someone actually scraped the baked cheese edges off the dish. That moment taught me that sometimes the humblest thing on the table is the one people craved most.
Making It Your Own
The beauty of this recipe is how forgiving it is once you understand the basic roux and cheese method. I have tossed in crumbled bacon, caramelized onions, and even roasted jalapeños depending on the mood and the crowd. Swapping half the cheddar for Gruyere or Monterey Jack changes the personality entirely without needing to adjust anything else in the method.
Tools That Actually Help
A heavy bottomed saucepan makes a real difference because it distributes heat evenly and protects your roux from scorching spots. A proper whisk, not a fork, keeps the sauce smooth from the very first stir. I also rely on a box grater for the cheese because the food processor tends to shred too finely, which changes how it melts.
Storing and Reheating
Leftovers keep well in the fridge for up to three days and reheat gently on the stove with a splash of milk to loosen the sauce back up. The microwave works too, but stir halfway through so the edges do not dry out while the center stays cold.
- Freeze individual portions in airtight containers for up to one month, though the texture of the sauce may soften slightly upon thawing.
- Never reheat more than once because the cheese sauce will break and become oily.
- Always add a little extra milk when reheating because the pasta absorbs moisture as it sits overnight.
 Save
Save Keep it simple, share it generously, and do not be surprised when it becomes the most requested thing you make. That is just what mac and cheese does.
Recipe FAQs
- → How do I keep the sauce smooth and glossy?
-
Start with a proper roux and add milk gradually while whisking. Remove the sauce from direct high heat before adding cheese and stir until melted; overheating can cause separation. Finely grate cheese and add it off the heat to maintain a silky texture.
- → Can I bake it without a breadcrumb topping?
-
Yes. You can transfer the sauced pasta to a baking dish and warm until bubbling; finishing under the broiler for a minute or two will brown the surface without breadcrumbs if you prefer.
- → What cheeses work best with this dish?
-
A blend of sharp and mild cheddar gives both flavor and melt. Gruyère, Monterey Jack, or a bit of Parmesan can be blended in for nuttiness and a smoother melt. Avoid pre-shredded cheese with anti-caking agents for best texture.
- → How can I make this gluten-free?
-
Use certified gluten-free pasta and substitute the all-purpose flour in the roux with a gluten-free blend or a cornstarch slurry (mix cornstarch with cold milk before adding). Check all labels for hidden gluten.
- → What’s the best way to store and reheat leftovers?
-
Cool and refrigerate in an airtight container for 3–4 days. Reheat gently on the stovetop with a splash of milk to loosen the sauce, or bake covered at 180°C (350°F) until warmed through. Add fresh breadcrumbs and broil to refresh the topping if desired.
- → How do I get a crisp, golden topping?
-
Toss breadcrumbs with melted butter and grated Parmesan, sprinkle evenly over the surface, and bake at 180°C (350°F) for 15–20 minutes until golden. A quick broil at the end will deepen the color and crunch—watch closely to avoid burning.
