 Save
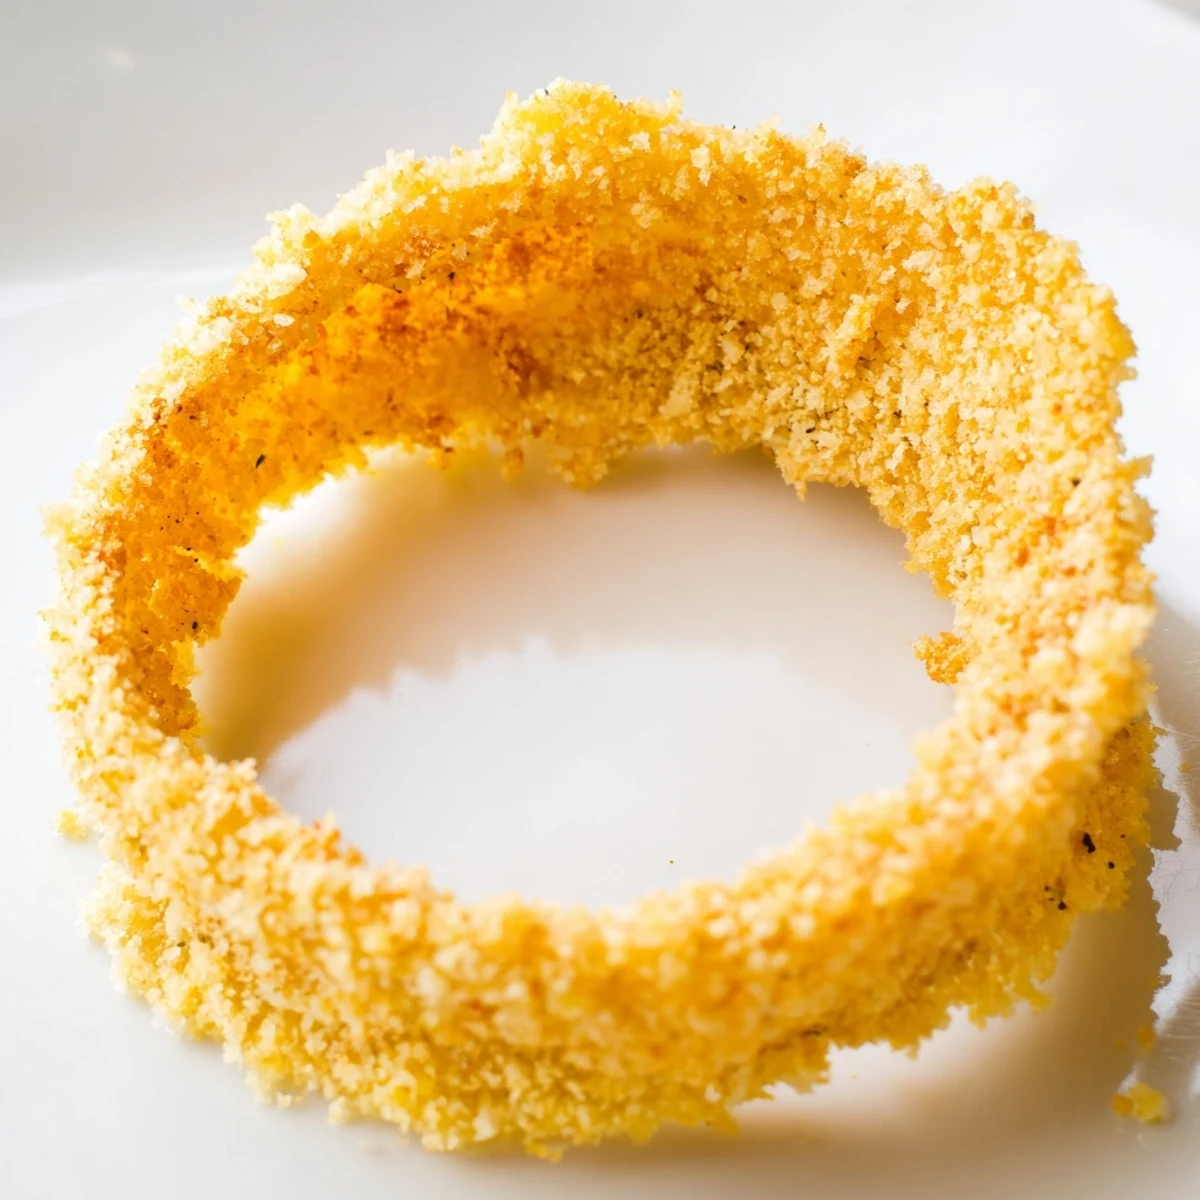
Save This dish features large yellow onions sliced into rings, coated in a seasoned flour mix, dipped in egg and buttermilk, then covered with a panko-Parmesan mixture. The onion rings are baked until golden and crunchy, delivering that satisfying crisp without frying. The addition of smoked paprika and garlic powder adds a smoky, savory depth, while a light spray of oil ensures perfect browning. Serve warm with your favorite dips for a flavorful snack or appetizer.
There's something about the sizzle of onion rings that immediately transports me back to lazy summer afternoons at my cousin's place, watching her pull a golden batch from the oven while we debated whether they were actually better than the deep-fried version from the local diner. That day, she let me taste-test fresh from the pan, and I was genuinely surprised—the crunch was real, the interior tender, and best of all, my fingers didn't come away greasy. I've been making them this way ever since, and now my kitchen smells like crispy, caramelized onions instead of stale fry oil.
I made these for a small dinner party last fall, and my friend Sarah actually set her fork down mid-bite and asked for the recipe right then and there—that's when I knew they were worth keeping in rotation. She'd been skeptical about baked onion rings until that moment, convinced they'd be sad and limp, but the coating held its crunch through dinner and dessert. Now whenever she hosts, she mentions these, which is the highest compliment I can receive.
Ingredients
- Large yellow onions (2): The sweet ones work best here—avoid red onions which can turn bitter when baked. Thicker rings stay sturdier during breading and cooking.
- All-purpose flour (1 cup): This is your dry base coat and helps everything else stick; don't skip it even though it seems redundant.
- Large eggs (2): The binder that makes the breadcrumbs adhere; use room-temperature eggs for smoother mixing.
- Buttermilk (1 cup): The acidity tenderizes and adds tang; regular milk works in a pinch, but you'll miss that subtle sour note.
- Panko breadcrumbs (2 cups): Larger crumbs than regular breadcrumbs create superior crunch—this is where the magic happens.
- Grated Parmesan cheese (½ cup): Adds savory depth and helps the coating brown beautifully; use freshly grated if possible.
- Smoked paprika (1 teaspoon): The secret ingredient that makes people ask what's different about your onion rings.
- Garlic powder and onion powder (½ teaspoon each): These deepen the onion flavor rather than compete with it.
- Salt and black pepper (½ teaspoon and ¼ teaspoon): Taste as you go; onions release moisture so you may need slightly more salt than expected.
- Cooking spray or olive oil spray: The final crucial step—this spray browns the coating and locks in crunch.
Instructions
- Heat your oven and prep the stage:
- Set your oven to 220°C (425°F) and line two baking sheets with parchment paper, then give them a light coating of cooking spray. This prevents sticking and creates a little steam pocket that helps crisping.
- Slice and separate your onions:
- Peel the onions and slice them into clean ½-inch rings—you want them thick enough to hold their shape but thin enough to cook through. Toss out the tiny papery inner rings; they'll burn while the bigger ones cook.
- Build your three-bowl breading station:
- Bowl 1 gets your flour mixed with salt, pepper, garlic powder, onion powder, and smoked paprika—whisk it all together so the seasoning distributes evenly. Bowl 2 is just eggs beaten with buttermilk until smooth and slightly frothy. Bowl 3 combines panko with freshly grated Parmesan, and honestly, smell it for a moment—that's what your rings will taste like.
- Coat each ring with intention:
- Work quickly but not frantically; dip each ring in flour first, shake off the excess, then dip into the egg mixture, letting the excess drip back into the bowl. Finally, press it into the panko mixture, turning gently so both sides get coated, and set on your prepared sheet.
- Spray and bake for the first round:
- Arrange rings in a single layer on your baking sheets—don't crowd them or they'll steam instead of crisp. Give the top surface a generous light spray with cooking oil, then slide into the oven for 10 minutes until they start to turn golden on the edges.
- Flip and finish with precision:
- Carefully flip each ring using tongs (a spatula tends to crack the coating), spray the newly exposed side lightly, and bake another 8–10 minutes until both sides are deeply golden and the coating is crunchy enough to crackle when you break into it.
- Rest and serve while they're at their peak:
- Pull them from the oven and let them cool on the baking sheet for just 2 minutes—this firms up the coating slightly. Serve immediately with whatever sauce calls to you.
 Save
Save The first time I served these at a casual weeknight dinner, my teenager actually complimented my cooking without sarcasm, which is rarer than a perfectly baked onion ring. That moment reminded me that sometimes the simplest dishes—just onions and breading—create the most genuine memories around a table.
The Secret to Restaurant-Quality Crunch
The key lies in that final oil spray before and after baking; it's the difference between a crispy exterior and a dull, dense coating. I used to skip this step thinking the butter in the breading would be enough, and I always ended up disappointed. Once I embraced the spray, everything changed—the panko turned bronze and shattered between my teeth exactly like fried onion rings should.
Timing and Temperature Matter More Than You'd Think
High heat is your friend here; 220°C (425°F) is deliberately hot because it needs to crisp the outside before the onion inside steams into mush. I once tried lowering the temperature to 200°C thinking it would be gentler, and the rings came out pale and soggy after 25 minutes. Going back to the higher heat and cutting the time by half fixed everything instantly.
Serving and Storage Ideas
These taste best eaten within 10 minutes of coming out of the oven, but if you need to make them ahead, you can reheat them in a 180°C oven for 5 minutes to restore some crunch. I've found that a spicy mayo made with sriracha, a cool ranch, or even just good ketchup all work perfectly—though my personal favorite is a garlicky aioli that cuts through the richness beautifully.
- Store leftovers in an airtight container for up to 2 days, though they'll never be quite as crispy as fresh.
- Leftover onion rings can be chopped and tossed into a breakfast scramble or salad for a textural surprise.
- Double the recipe if you're feeding a crowd; they disappear faster than you'd expect.
 Save
Save These onion rings have become my go-to when I want to impress without fussing, and the joy of pulling golden, crunchy rings from the oven never gets old. They're proof that some of the best food doesn't require deep fryers or complicated techniques—just butter, heat, and a little attention.
Recipe FAQs
- → How do I get the onion rings extra crispy when baking?
-
Use panko breadcrumbs mixed with grated Parmesan and spray the coated rings lightly with oil before baking. Flipping halfway ensures even crispness.
- → Can I prepare the onion rings ahead of time?
-
You can bread the rings in advance and refrigerate briefly, but bake just before serving for the best crunch.
- → What variations can add more flavor to the coating?
-
Incorporate spices like smoked paprika, cayenne, garlic, or onion powder into the flour mix for added savory notes.
- → Is baking better than frying for onion rings?
-
Baking results in a lighter, less oily finish while still achieving a satisfying crunch with proper coating techniques.
- → What dips pair well with these baked onion rings?
-
Try spicy mayo, ranch dressing, ketchup, or mustard-based dips to complement the crispy texture and seasoning.
